Introduction
Puppeteer is a popular Node.js library that provides a high-level API to control headless Chrome or Chromium browsers. It's used to automate browser tasks and interactions, such as PDF generation, screenshots, web scraping, automated testing, and pre-rendering SPAs.
For a comprehensive guide on generating PDFs with Puppeteer, check out our Guide to Puppeteer.
While Puppeteer is a great choice for browser automation, deploying it in a serverless environment like AWS Lambda comes with unique challenges around package size and runtime dependencies (see next section).
So why choose Lambda? Despite these challenges, the serverless model is a great deployment choice for many developers due to its benefits, such as pay-per-use pricing, automatic scaling, and zero need for server management or provisioning. In this article, we'll guide you through deploying Puppeteer on AWS Lambda, overcoming size and dependency hurdles to harness serverless automation.
DocuPotion tip: A lot of the examples in this article deal with generating PDFs with Puppeteer (it's what we know best). However, the info on how best to deploy Puppeteer on Lambda will be useful regardless of your use case and we do discuss some other use cases in this section.
Why is Deploying Puppeteer on AWS Lambda Complicated?
The key challenges most developers face when deploying Puppeteer on Lambda revolve around size limits, the constrained nature of a serverless environment, and performance issues. Let's explain in detail.
The standard puppeteer package includes a full version of Chrome for Testing (previously Chromium), which is generally around 170-280MB in size. This easily exceeds the standard AWS Lambda deployment package limits (50MB zipped for direct upload, and up to 250MB unzipped via S3).
On environment compatibility, Lambda's minimal Linux environment lacks libraries required by standard Chrome for Testing to run perfectly. This results in missing system dependencies such as fonts (for proper PDF rendering) and shared libraries (like libnss3.so), which can cause launch failures.
Cold starts are another challenge that occurs when a Lambda function hasn't been used recently, and AWS needs to spin up a new execution environment. This "cold start" period is significantly extended by the large size of the Chrome for Testing binary and its dependencies, leading to slow response times for the first user or event.
The solution to these issues is a two-part strategy:
- First, use
puppeteer-coreinstead of the fullpuppeteerpackage.puppeteer-corecontains the API to use Puppeteer, but does not bundle a browser - Then pair it with a serverless-optimized Chromium build like
@sparticuz/chromiumor@sparticuz/chromium-min. This package provides a compressed, Lambda-compatible Chromium binary (~50MB compressed) that includes necessary dependencies for Puppeteer to work correctly.
Options for Deploying Puppeteer on AWS Lambda
There are three primary architectural choices for deploying Puppeteer on Lambda:
- Lambda Layers: This is best when you have multiple functions sharing Puppeteer, or prefer using community-maintained layers for ease. It centralizes dependencies, reducing redundancy.
- Direct S3 Bundle: Ideal for single or few functions where you want everything in one package without external references.
- Docker Container: Use this for custom system dependencies (such as additional binaries) or when exceeding 250MB limits. It's great for complex apps, but adds overhead in build and deployment for simple apps.
| Approach | Pros | Cons |
|---|---|---|
| Lambda Layers | Reusable across multiple functions, smaller per-function deployments | Layer size limits (250MB unzipped total across 5 layers), version management overhead |
| Direct S3 Bundle | Self-contained deployment, simple mental model, no layer versioning | Duplicates Chromium per function, larger individual deploys |
| Docker Container | Full control over environment, larger size limit (10GB uncompressed) | More complex setup with ECR, potentially slower cold starts for large images |
In this guide, we'll cover the Lambda Layers and Direct S3 Bundle approaches.
Prerequisites
Before you continue, ensure you have the following:
- An AWS Account with permissions to create Lambda functions, IAM roles, S3 buckets, and layers.
- The AWS CLI is installed and configured with credentials (run
aws configure). - Node.js 18+ and npm/yarn installed locally.
- Basic familiarity with AWS Lambda concepts like functions, triggers, and roles.
zipor a similar tool to create archive files.
Set Up the Project
First, we'll set up our local development environment.
Create a new project directory and initialize it:
mkdir lambda-puppeteer-layer
cd lambda-puppeteer-layer
npm init -y
Next, we'll install the following required dependencies:
puppeteer-core: This is the lightweight version of Puppeteer that doesn't download Chromium when installed.@sparticuz/chromium-min: A smaller (31kb) version of @sparticuz/chromium that doesn't come with Chromium Brotli files or Chrome for Testing. To use it, we need to specify the Chromium files' location ourselves, such as a remote URL or an S3 bucket. Luckily, every new release of the package comes with a downloadable chromium-[version]-pack.tar, making it easier to use the tarball's GitHub CDN link directly in our code.
Why @sparticuz/chromium-min? As at the time of writing this guide, the latest version (v143.0.4) of @sparticuz/chromium, when zipped, still exceeds AWS Lambda 50MB upload limit.
For version compatibility, it's recommended that the Puppeteer version you install is compatible with @sparticuz/chromium or @sparticuz/chromium-min. As of today, the latest version of Chrome for Testing is 143.0.7499.169. Therefore, we need to install @sparticuz/chromium-min version 143.0.4.
Run the following command to install the dependencies:
npm install puppeteer-core@24.34.0 @sparticuz/chromium-min@143.0.4Writing the Puppeteer Lambda Function
For this demo, we'll create a Lambda handler function that generates a PDF from a URL using puppeteer-core and @sparticuz/chromium-min.
Create an index.js file in the project root with the following content:
const chromium = require('@sparticuz/chromium-min');
const puppeteer = require('puppeteer-core');

exports.handler = async (event) => {
  let browser = null;

  try {
    browser = await puppeteer.launch({
      args: chromium.args,
      defaultViewport: chromium.defaultViewport,
      executablePath: await chromium.executablePath(`https://github.com/Sparticuz/chromium/releases/download/v143.0.4/chromium-v143.0.4-pack.x64.tar`),
      headless: chromium.headless,
      ignoreHTTPSErrors: true,
    });

    const page = await browser.newPage();
    const url = event?.url || 'https://developer.mozilla.org/en-US/docs/Web/JavaScript';

    await page.goto(url, { waitUntil: 'networkidle2' });

    const pdfBuffer = await page.pdf({
      format: 'A4',
      printBackground: true,
    });

    return {
      statusCode: 200,
      headers: { 'Content-Type': 'application/pdf' },
      body: pdfBuffer.toString('base64'),
      isBase64Encoded: true,
    };
  } catch (error) {
    return {
      statusCode: 500,
      body: JSON.stringify({ error: error.message }),
    };
  } finally {
    if (browser) {
      await browser.close();
    }
  }
};
Let's go over the key arguments we passed in the puppeteer.launch() method above:
chromium.args: Provides a pre-configured array of command-line arguments optimized for launching Chromium in serverless environments. It contains flags like:--no-sandbox: Disables the Chromium browser's security sandbox--disable-gpu: Disables GPU hardware acceleration--disable-dev-shm-usage: Uses /tmp instead of /dev/shm for shared memory, avoiding memory issues in containerized environments
chromium.executablePath(): This points to a GitHub CDN link as the source for the Chromium files.chromium.defaultViewport: Sets default page size (for example,{width: 1280, height: 800}).
Note: Using the GitHub URL works for development and testing, but for production you should host the chromium binary in your own S3 bucket or use a Lambda Layer (covered below) to avoid cold start latency and external dependencies.
Deploying with Lambda Layers (Primary Approach)
A Lambda Layer is basically a reusable package (ZIP file) that contains libraries or other dependencies, such as Chromium, which you can attach to one or many Lambda functions so that you don't have to upload the same large files over and over again. This allows you to upload Chromium once and share it.
Option 1: Use Pre-built Community Layers
One of the simplest ways to deploy Puppeteer to Lambda is to use a pre-built layer that someone in the community has already created, especially for @sparticuz/chromium-min. Each pre-built layer has an Amazon Resource Name (ARN) that you can copy and attach to your Lambda function. The ARN normally follows a format such as:
arn:aws:lambda:us-east-1:123456789012:layer:chromium:1
After you have the ARN, open the Lambda console, go to your function, add a layer, paste the ARN, and attach it directly without rebuilding Chromium yourself.
Option 2: Build Your Own Layer
Alternatively, you can create your own Lambda layer if you want full control or don't want to rely on community-maintained ARNs. The general process of creating and using layers with Lambda involves these three steps:
- Package the layer content in a .zip file archive
- Create the layer in Lambda
- Add the layer to a Lambda function(s)
Instead of using the Lambda web console, it is often more reliable to create and publish the layer using the AWS CLI - this makes sense since we're already working from a local development environment. We'll use the publish-layer-version AWS CLI command to create the layer.
It's important to note that when deploying Node.js projects to Lambda in this way, the folder structure matters a lot, because Lambda looks for files in specific directories such as /nodejs/node_modules. If these folders are missing, the whole deployment process may fail.
Step 1: Package the Layer in a ZIP File
First, we'll cd into the project root and then run the following command to create the required folder structure:
mkdir -p nodejs/node_modulesNext, we'll copy the @sparticuz/chromium-min module and other dependencies from lambda-puppeteer-layer/node_modules into lambda-puppeteer-layer/nodejs/node_modules/:
cp -r node_modules nodejs/Now your folder directory should look like this:
lambda-puppeteer-layer/
 ├── node_modules/
 ├── nodejs/
 │   ├── node_modules/
 │   │   ├── @sparticuz/
 │   │   ├── ...
 ├── index.js
 ├── package-lock.json
 ├── package.json
Then create a ZIP archive of the nodejs directory and its contents:
zip -r layer-package.zip nodejsStep 2: Upload the Layer with AWS CLI
Here, we'll use the aws lambda publish-layer-version command to upload the zipped package we created in the previous step to AWS Lambda. Run the following command in the project root directory in your terminal:
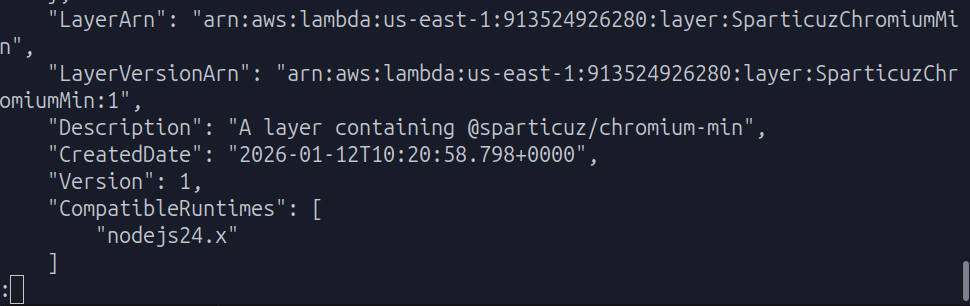
aws lambda publish-layer-version --layer-name "SparticuzChromiumMin" --description "A layer containing @sparticuz/chromium-min" --zip-file "fileb://layer-package.zip" --compatible-runtimes nodejs24.x --region us-east-1--layer-name: Specifies a unique name for the layer.--zip-file "fileb://layer-package.zip": Specifies the local ZIP file to upload.fileb://is required for binary file uploads from a local path.--compatible-runtimes: Specifies the Node.js runtime(s) this layer is compatible with (e.g.,nodejs20.x).--region: The AWS region you are working in (here, we usedus-east-1).
Upon success, look for LayerARN in the terminal output and copy the value. You'll need to attach the layer to the Lambda function later.
Step 3: Create a Lambda Function
To create a Lambda function, you need to complete the required prerequisites, then complete the following steps:
- Open the Functions page of the Lambda console.
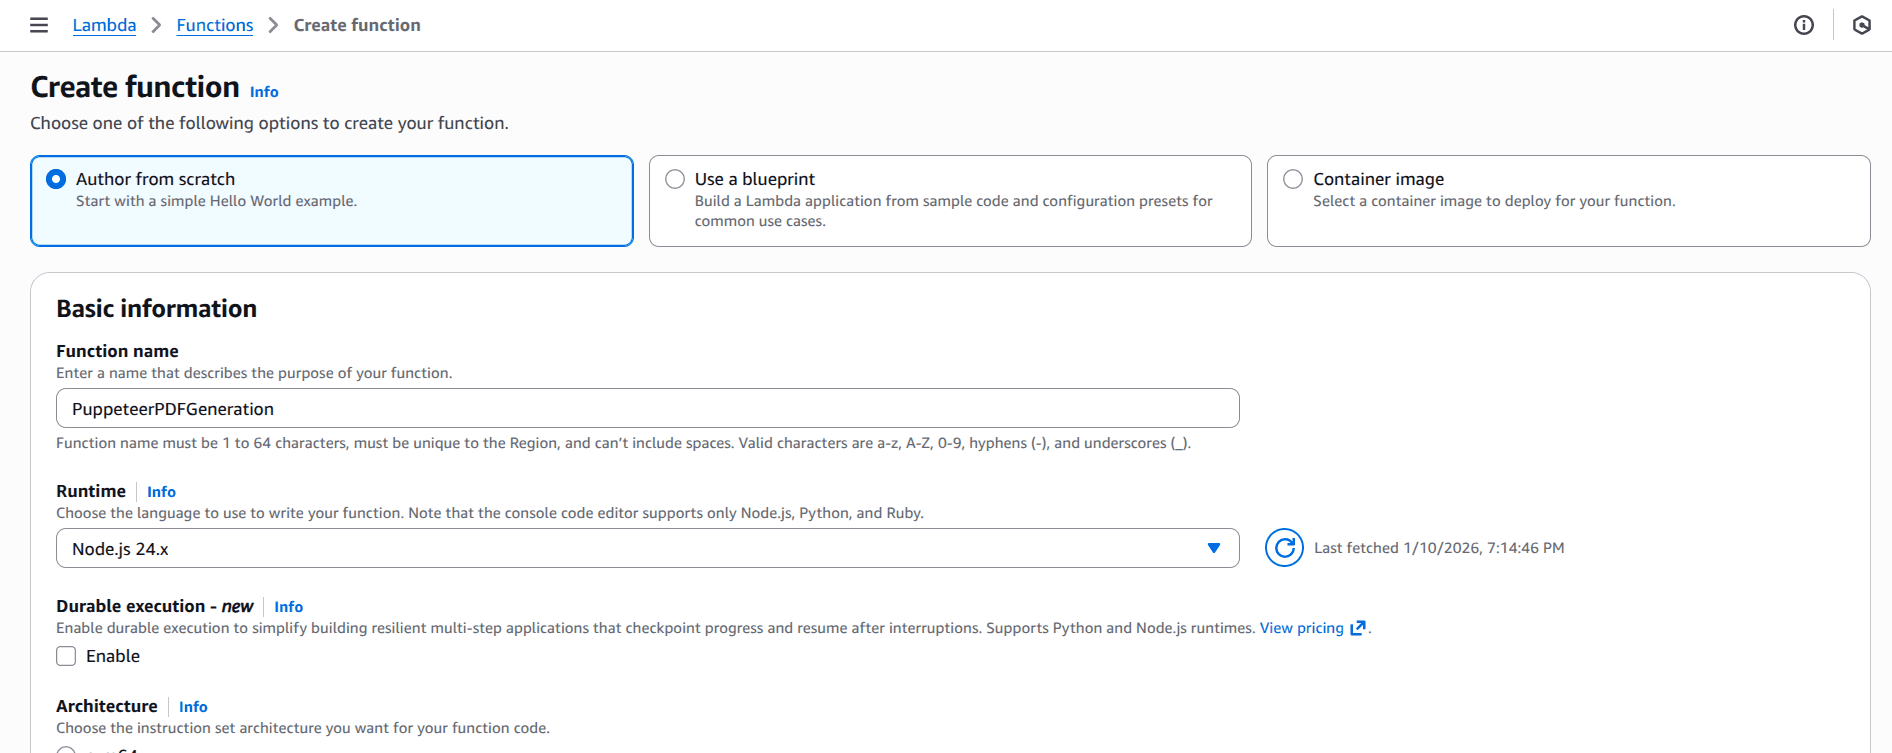
- Choose Create function.
- Select Author from scratch.
- In the Basic information pane, for Function name, enter
PuppeteerPDFGeneration. - For Runtime, choose Node.js 24
- Leave architecture set to x86_64, and then choose Create function.
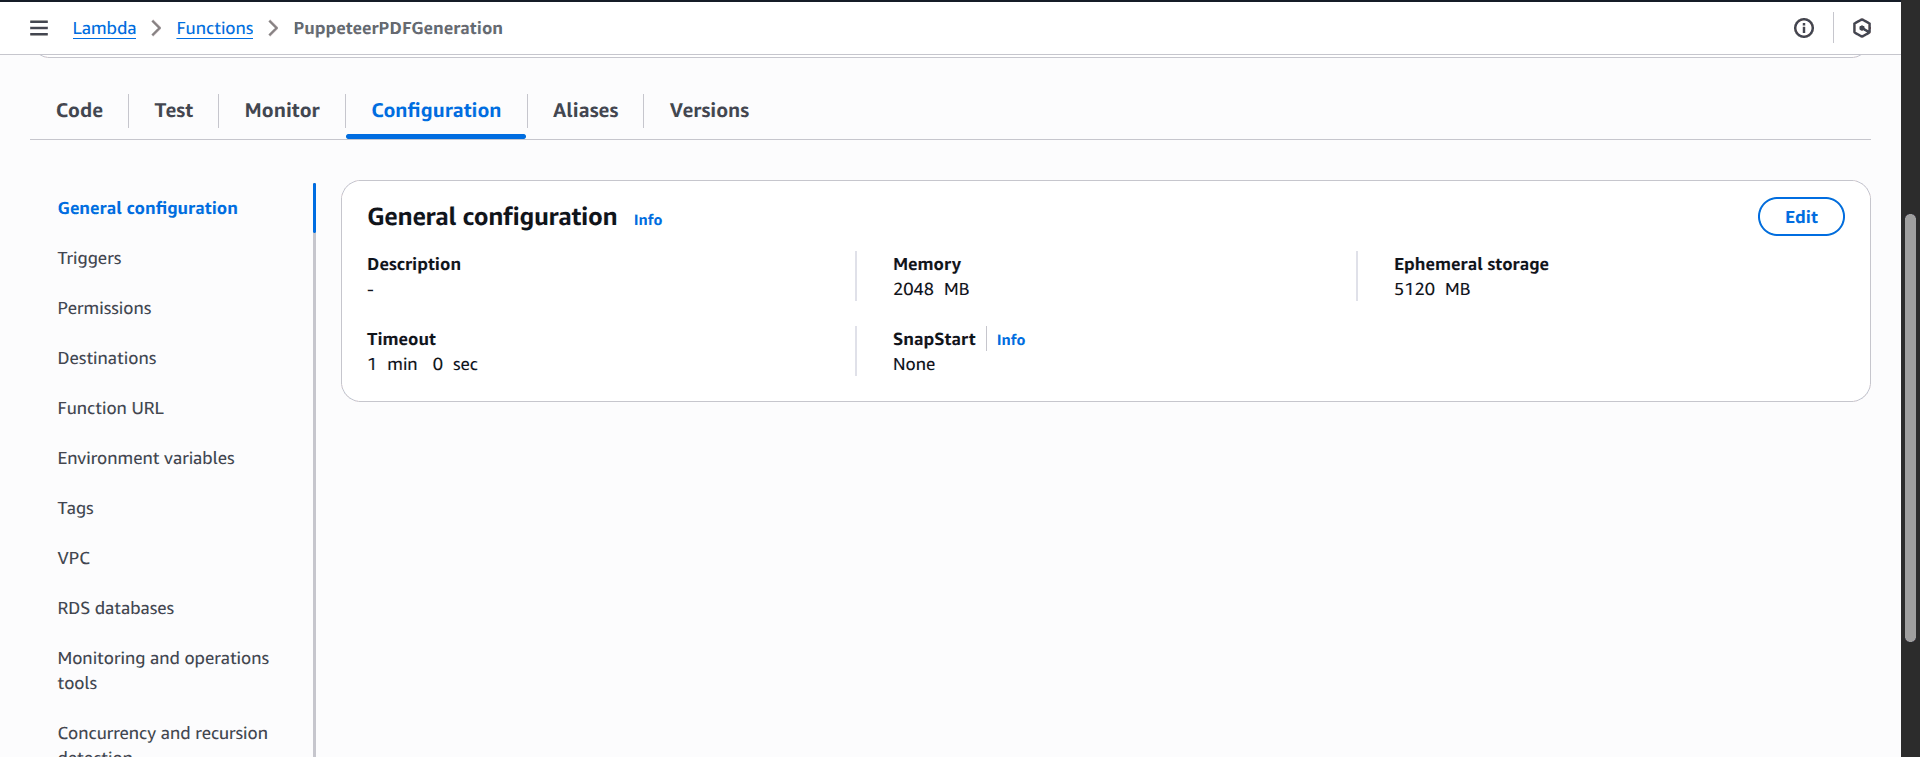
In the Configuration > General configuration tab, increase the server resources for better and more reliable performance:
- Memory: to at least 2048 MB
- Ephemeral storage: to at least 5120 MB
- Timeout: to at least 1 min 0 sec.
DocuPotion tip: Increasing the memory, ephemeral storage and timeout will increase the costs of running your Lambda. It's worth experimenting with these configurations so you don't add unnecessary resources.
Step 4: Import the Function Code in Lambda Console
Next, run the following command to create a zipped file of the code in index.js in the local root directory:
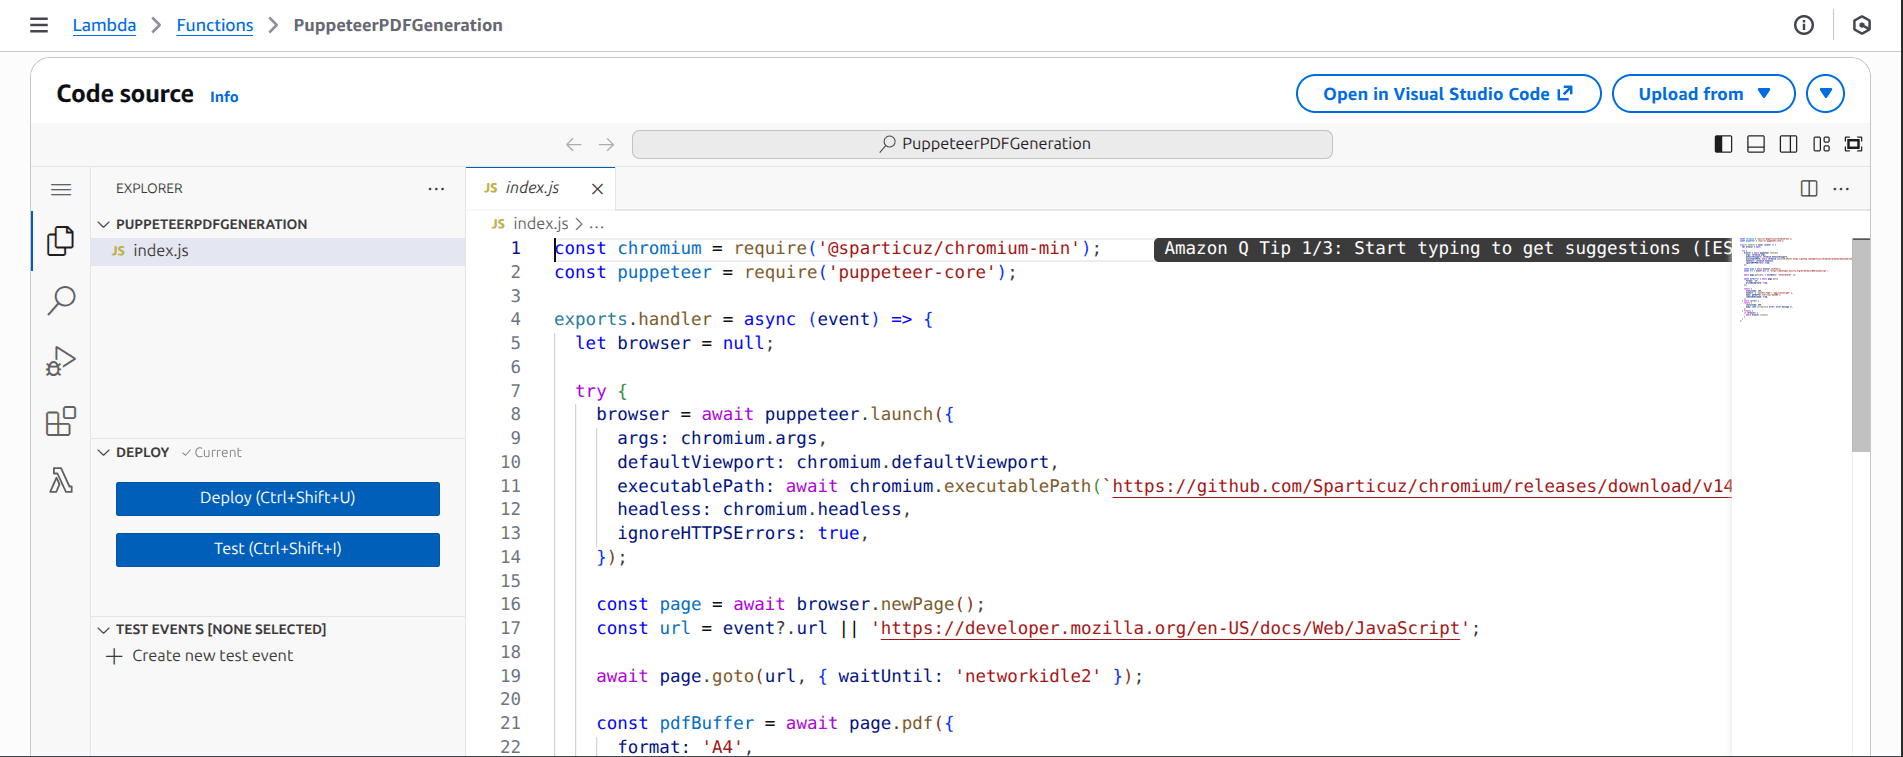
zip -r function.zip index.jsNow go to the newly created PuppeteerPDFGeneration function page in Lambda console, locate the Code source section, and import the function.zip file:
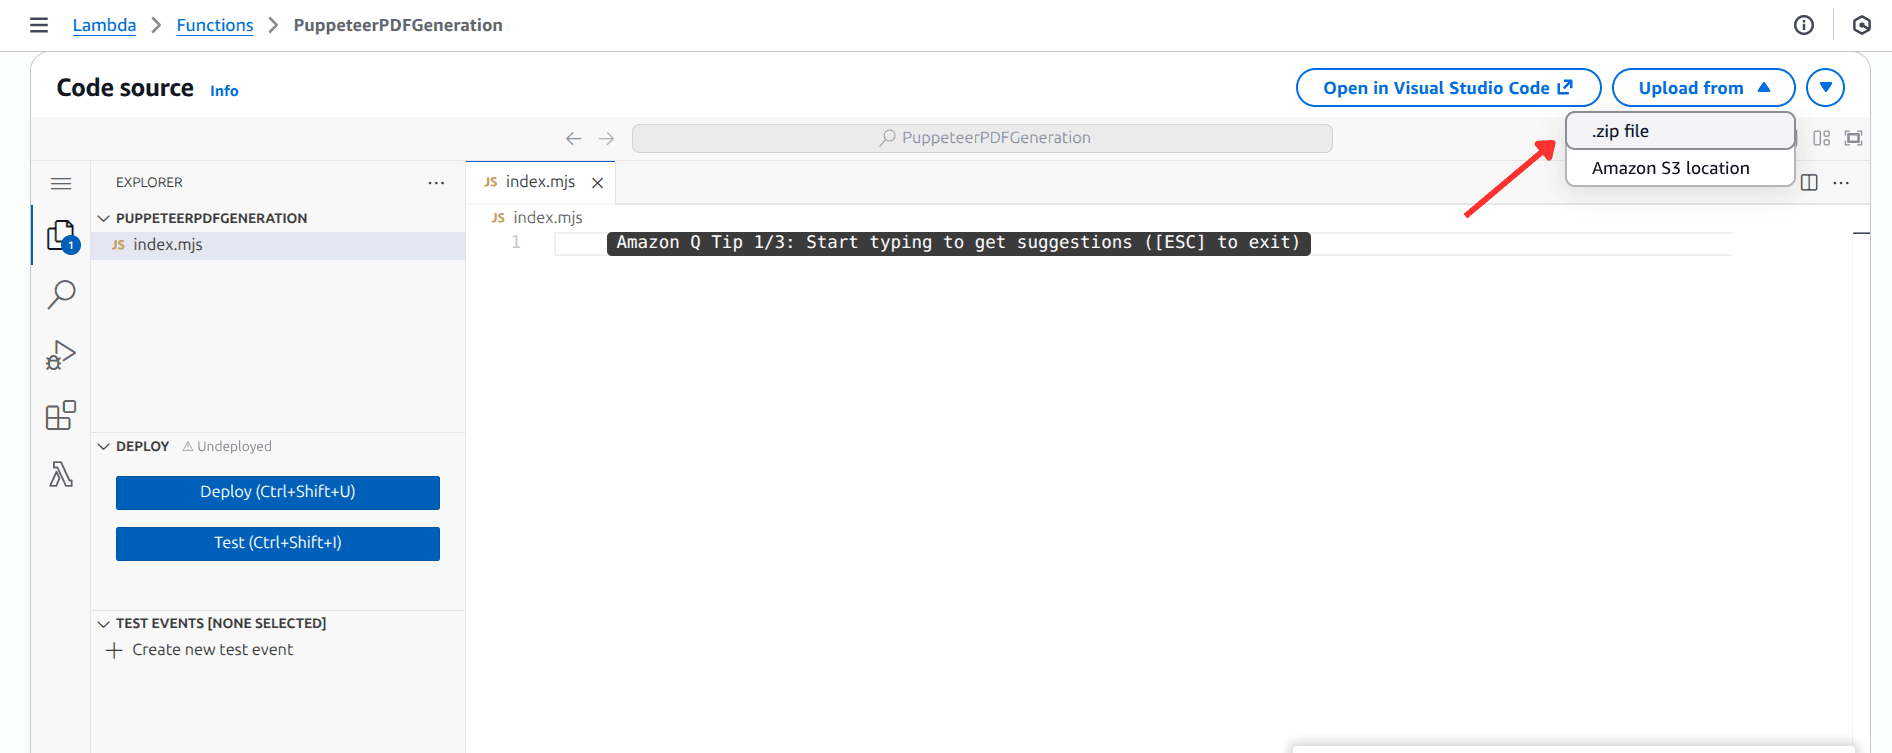
On successful import, the code editor should be updated as shown in the following screenshot:
Step 5: Attach the Layer to the Lambda Function
Next, replace <YOUR_LAYER_VERSION_ARN> in the following command with the LayerARN you copied earlier and <YOUR_AWS_REGION> with the region your Lambda function is deployed to and run:
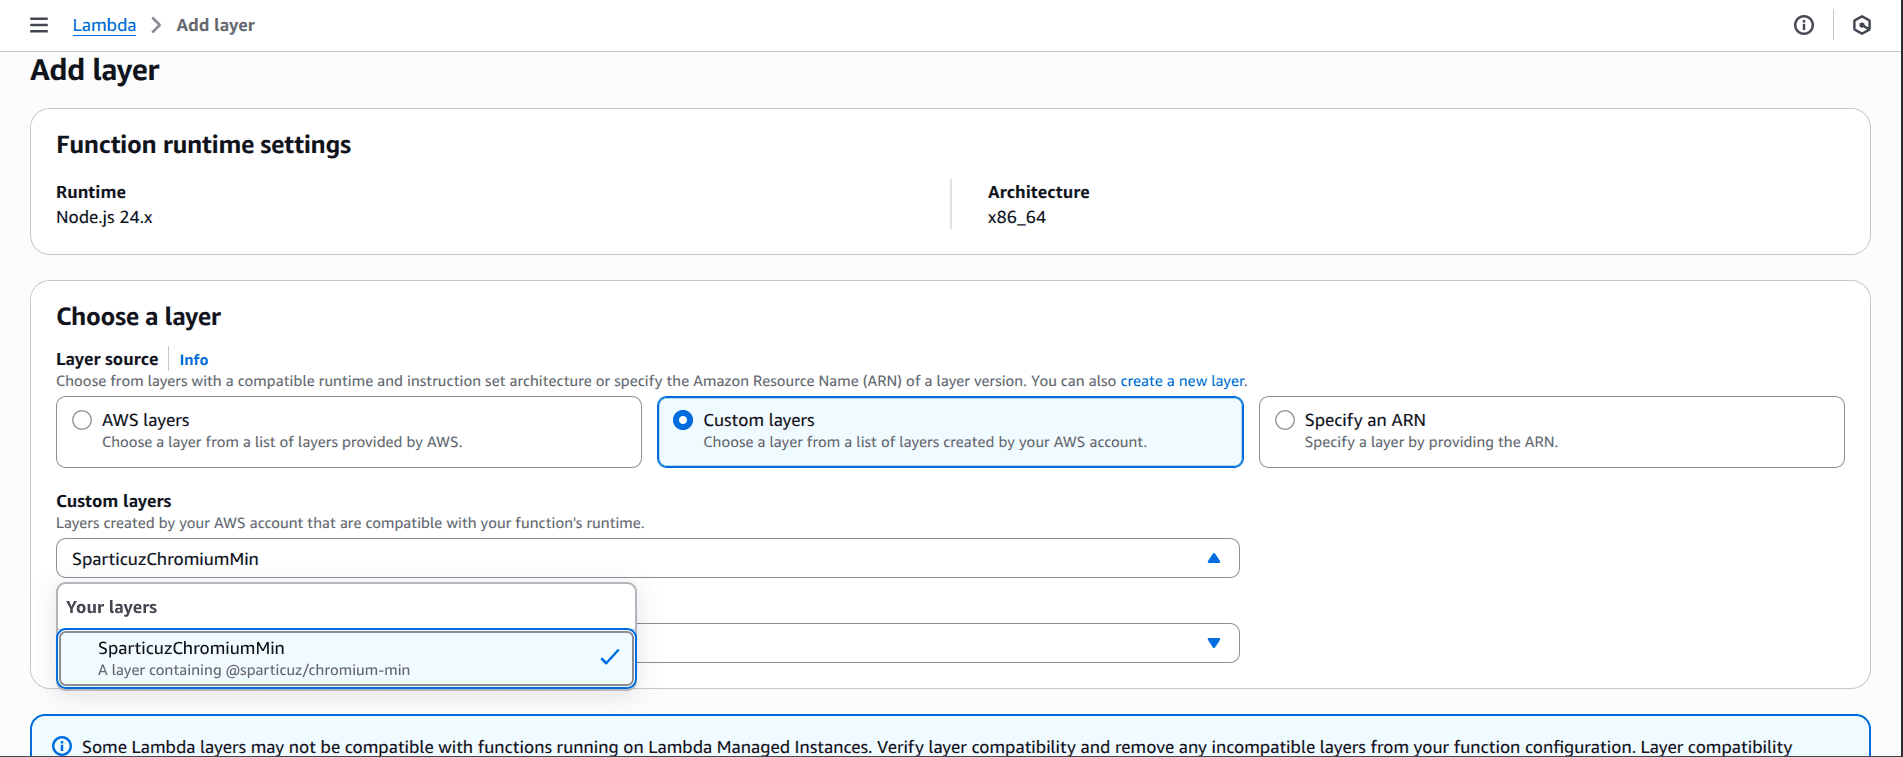
aws lambda update-function-configuration --function-name PuppeteerPDFGeneration --layers <YOUR_LAYER_VERSION_ARN> --region <YOUR_AWS_REGION>Alternatively, you can attach the layer from the Layers > Add a layer section in the PuppeteerPDFGeneration Lambda console page and select the SparticuzChromiumMin layer we published earlier from the Custom layers option.
Deploying with Direct S3 Bundle (Alternative Approach)
Rather than using Lambda Layers, the S3 method is recommended when you have only one or two functions, prefer self-contained deploys, or want to avoid layer management totally.
Here, we'll bundle everything (function code, node_modules with both puppeteer-core and @sparticuz/chromium-min) into a ZIP, upload it to S3, and point the Lambda function to that S3 object, bypassing the 50MB direct upload limit.
In the project root, delete all zipped files present and the nodejs folder so that the directory looks like this:
lambda-puppeteer-layer/
 ├── node_modules/
 ├── index.js
 ├── package-lock.json
 ├── package.json
Now run the following command to create a deployment zipped package:
zip -r function.zip index.js package.json node_modulesNext, run the following command to create an S3 bucket:
aws s3 mb s3://puppeteer-pdf-generationBefore running the above command, ensure the AWS IAM User has the permissions to create S3 buckets, preferably, the AmazonS3FullAccess policy.
You should get the following output:
make_bucket: puppeteer-pdf-generationOn the S3 page of the AWS console, you should see the newly created bucket in the list of S3 buckets.
Now upload the zip folder to the S3 bucket:
aws s3 cp function.zip s3://puppeteer-pdf-generation/lambda-puppeteer/function.zipFinally, let's update our Lambda function to use the S3 bucket:
aws lambda update-function-code --function-name PuppeteerPDFGeneration --s3-bucket puppeteer-pdf-generation --s3-key lambda-puppeteer/function.zipBefore running the above command, ensure the IAM User has the permissions to modify Lambda functions, preferably, the AWSLambda_FullAccess policy.
You should receive an output similar to this:
{
    "FunctionName": "PuppeteerPDFGeneration",
    "FunctionArn": "arn:aws:lambda:us-east-1:913524926280:function:PuppeteerPDFGeneration",
    "Runtime": "nodejs24.x",
    "Role": "arn:aws:iam::913524926280:role/service-role/PuppeteerPDFGeneration-role-2opxuhib",
    "Handler": "index.handler",
    "CodeSize": 76011116,
    "Description": "",
    "Timeout": 3,
    "MemorySize": 128,
    "LastModified": "2026-01-10T20:33:56.000+0000",
    "CodeSha256": "aC9pIDvLo27AcUwAnOcsuieGQt9ixBonK+XlVZ07Q9Q=",
    "Version": "$LATEST",
    "TracingConfig": {
        "Mode": "PassThrough"
    },
    "RevisionId": "9b71d0e4-ce5c-4351-a977-6f0d96a4875a",
    "State": "Active",
    "LastUpdateStatus": "InProgress",
    "LastUpdateStatusReason": "The function is being created.",
    "LastUpdateStatusReasonCode": "Creating",
    ...
}
Save the PDFs Generated by Puppeteer to S3
Lambda's synchronous response limit is 6MB, so for larger PDFs or persistence, it's better to save to S3. This enables sharing via signed URLs and offloads storage.
Let's create an S3 bucket called puppeteer-pdf-outputs to store the PDFs:
aws s3 mb s3://puppeteer-pdf-outputsNext, we'll install the Amazon S3 client for the AWS SDK for JavaScript v3, used for programmatically interacting with Amazon S3 from Node.js, browser, and React Native environments. We'll also install @aws-sdk/s3-request-presigner for generating the pre-signed URL:
npm install @aws-sdk/client-s3 @aws-sdk/s3-request-presignerNext, update the code in index.js to upload and return a signed URL:
const chromium = require("@sparticuz/chromium-min");
const puppeteer = require("puppeteer-core");
const {
  S3Client,
  PutObjectCommand,
  GetObjectCommand,
} = require("@aws-sdk/client-s3");
const { getSignedUrl } = require("@aws-sdk/s3-request-presigner");

const s3Client = new S3Client({ region: "us-east-1" }); // change if necessary

exports.handler = async (event) => {
  let browser = null;

  try {
    browser = await puppeteer.launch({
      args: chromium.args,
      defaultViewport: chromium.defaultViewport,
      executablePath: await chromium.executablePath(
        "https://github.com/Sparticuz/chromium/releases/download/v143.0.4/chromium-v143.0.4-pack.x64.tar"
      ),
      headless: chromium.headless,
      ignoreHTTPSErrors: true,
    });

    const page = await browser.newPage();

    const targetUrl =
      event?.url ||
      "https://developer.mozilla.org/en-US/docs/Web/JavaScript";

    await page.goto(targetUrl, { waitUntil: "networkidle2" });

    const pdf = await page.pdf({
      format: "A4",
      printBackground: true,
    });

    const bucketName = "puppeteer-pdf-outputs"; // ensure bucket exists
    const s3Key = `pdfs/${Date.now()}.pdf`;

    // Upload PDF to S3
    await s3Client.send(
      new PutObjectCommand({
        Bucket: bucketName,
        Key: s3Key,
        Body: pdf,
        ContentType: "application/pdf",
      })
    );

    // Create signed URL
    const signedUrl = await getSignedUrl(
      s3Client,
      new GetObjectCommand({
        Bucket: bucketName,
        Key: s3Key,
      }),
      { expiresIn: 300 } // 5 minutes
    );

    return {
      statusCode: 200,
      body: JSON.stringify({
        pdfUrl: signedUrl,
        key: s3Key,
        bucket: bucketName,
      }),
    };
  } catch (error) {
    return {
      statusCode: 500,
      body: JSON.stringify({
        error: error.message,
      }),
    };
  } finally {
    if (browser) {
      await browser.close();
    }
  }
};
Now, we need to rezip the code and re-upload it to Lambda.
Create a new zipped package locally in the project root:
zip -r function.zip index.js package.json node_modulesUpload the zip package to S3 (this will overwrite the existing file in the S3 bucket):
aws s3 cp function.zip s3://puppeteer-pdf-generation/lambda-puppeteer/function.zipThen update the Lambda function to apply the code changes:
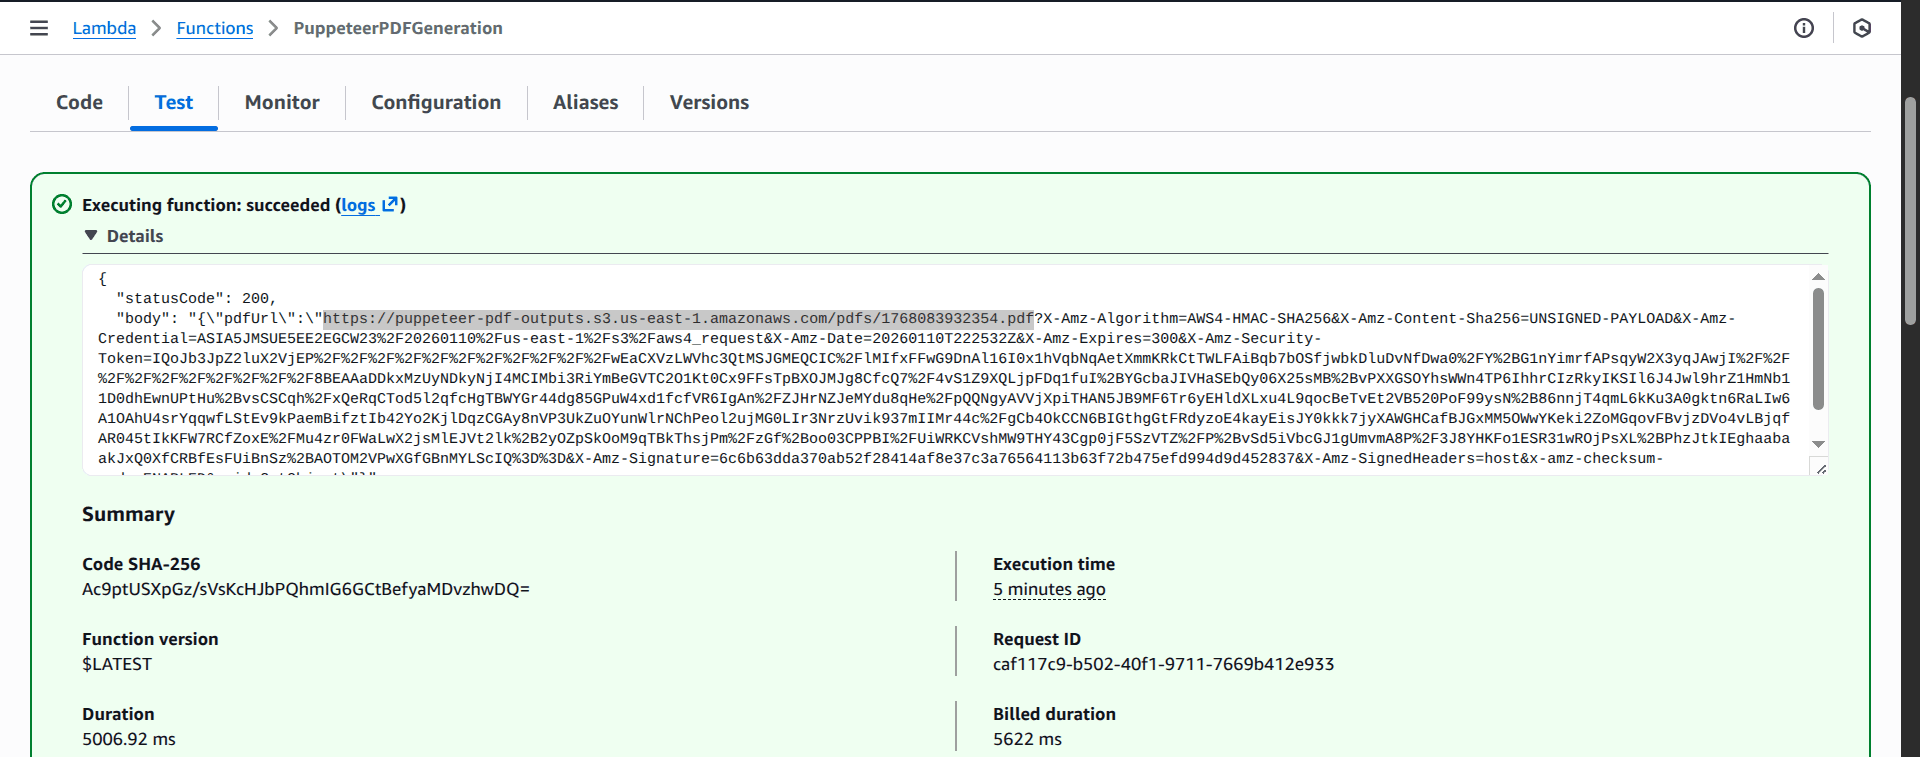
aws lambda update-function-code --function-name PuppeteerPDFGeneration --s3-bucket puppeteer-pdf-generation --s3-key lambda-puppeteer/function.zipNow when you test-run the code from the Test tab in the Lambda console page:
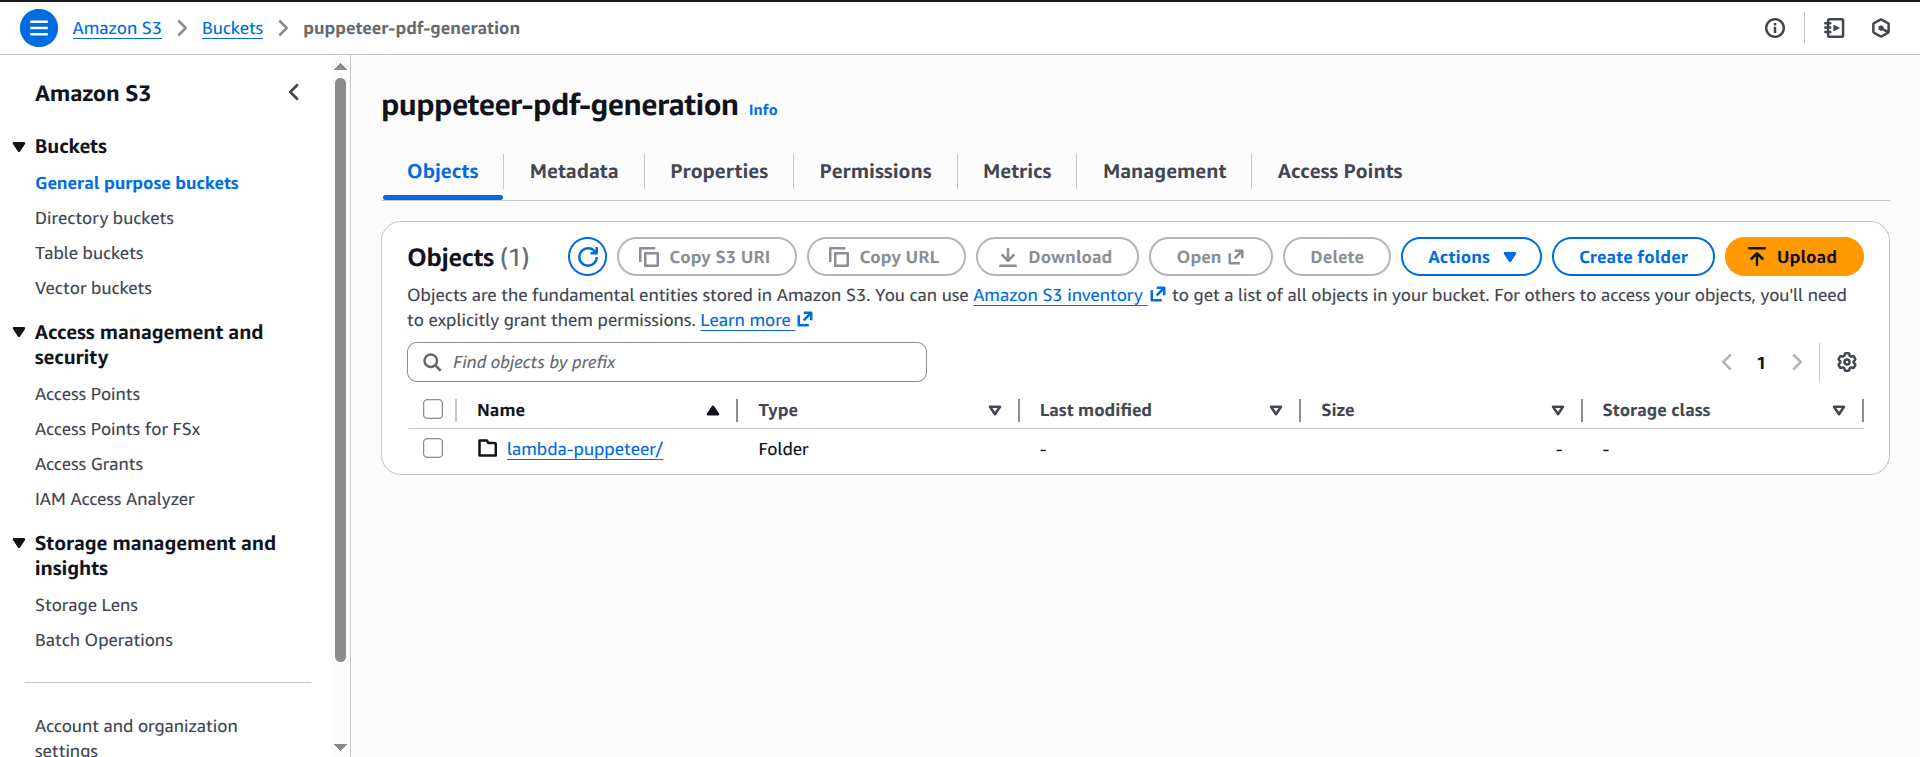
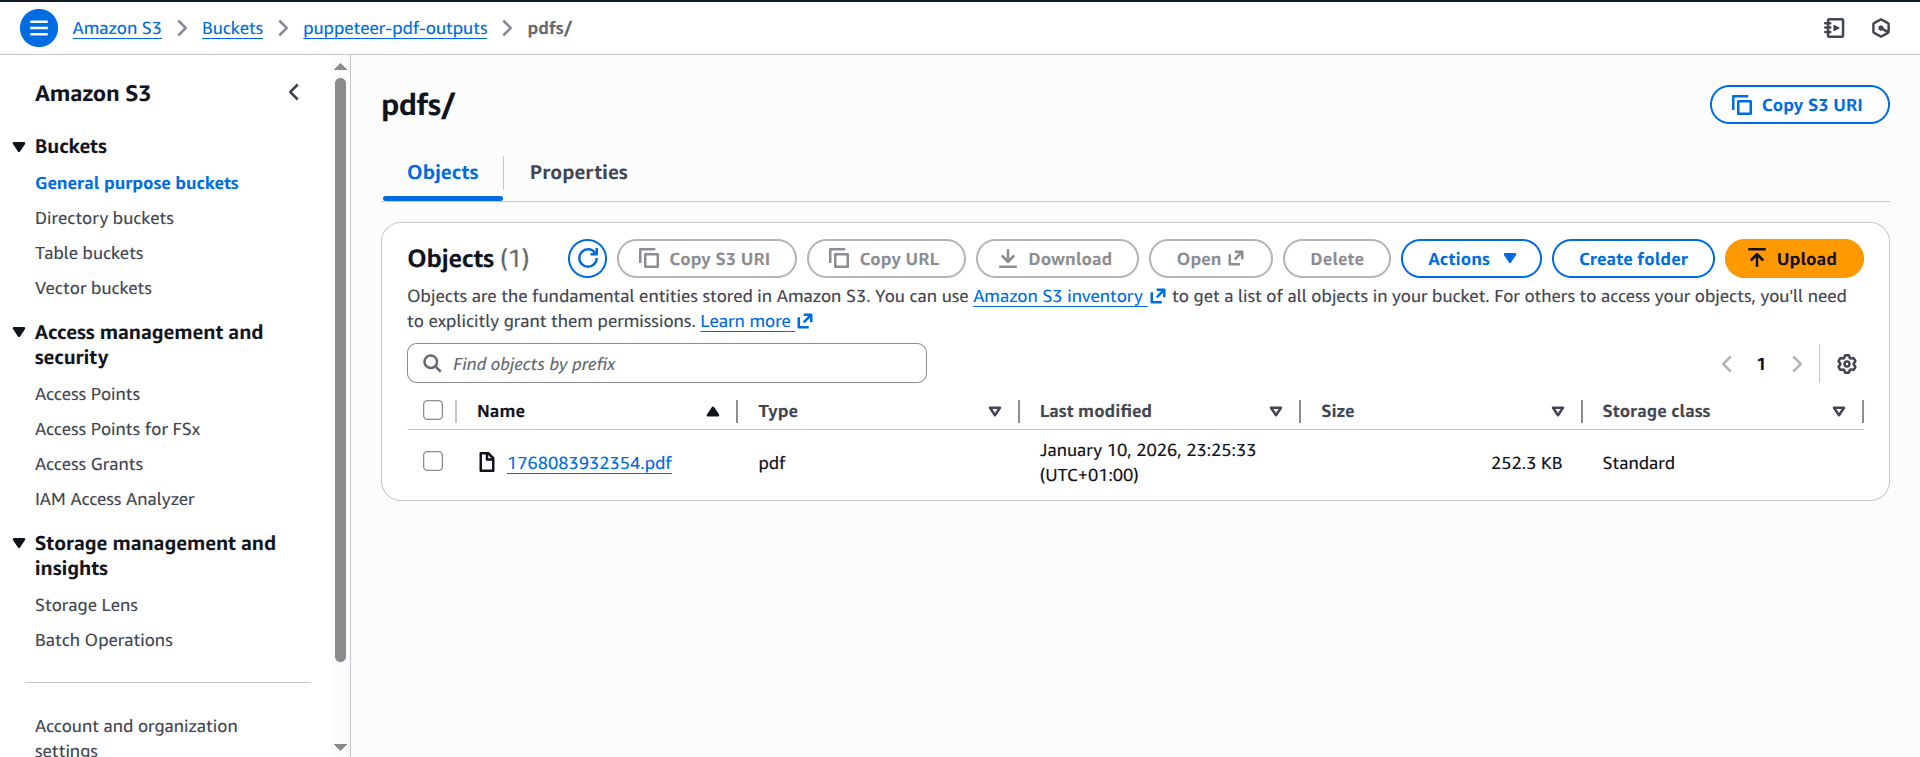
You should see the generated PDF file in the puppeteer-pdf-outputs S3 bucket, as shown in the following screenshot:
Adapting Puppeteer for Other Use Cases
One advantage of deploying to AWS Lambda is that the process works for any Puppeteer task, which makes the function code adaptable.
For example, you can modify the code to the following for screenshot generation:
// ...
const screenshotBuffer = await page.screenshot({
      type: "png",
      fullPage: true,
    });
const s3Key = `screenshots/${Date.now()}.png`;

const bucketName = "puppeteer-screenshots-outputs";

// 1. Upload the screenshot
const putCommand = new PutObjectCommand({
    Bucket: bucketName,
    Key: s3Key,
    Body: screenshotBuffer,
    ContentType: "image/png",
});
// ...
Or for web scraping:
// ...
// Use page.evaluate to extract data
    const scrapedData = await page.evaluate(() => {
      return {
        title: document.title,
        headings: Array.from(document.querySelectorAll("h1, h2")).map(
          (h) => h.textContent
        ),
      };
    });
    const s3Key = `scraper/${Date.now()}.json`;
    const bucketName = "puppeteer-scraper-outputs";
// ...
return {
  statusCode: 200,
  body: JSON.stringify(scrapedData),
};
Triggering the Lambda Function
Once the Lambda function is deployed, we need a way to run it. Earlier, you may have noticed that we ran it manually from the function page for testing. However, in a real-world scenario, we'd need to connect the function to an event source to trigger it.
Let's go through some of the most common ways to trigger a Lambda function.
API Gateway
Amazon API Gateway is a fully managed service that makes it easy to create, publish, maintain, monitor, and secure APIs at any scale. This method is often used when you want to call Puppeteer through an HTTP request.
The steps involved in triggering a Lambda function via an API Gateway are outlined as follows:
- Open the API Gateway console.
- Click Create API and select HTTP API.
- Give the API a name (e.g.,
Puppeteer-API) and click Next. - In Integrations, select Lambda and search for the
PuppeteerPDFGenerationfunction ARN. - Configure Routes. For example, set the method to
POSTand the resource path to/pdf. - Click Next through the stages (keep the default
$defaultstage) and then Create. - Find your Invoke URL in the API Gateway dashboard.

You can now trigger PDF generation from your app or Postman.
S3 Event Notifications
The Amazon S3 Event Notifications feature allows you to receive notifications when certain events happen in your S3 bucket. This method is useful when you want to trigger the Lambda function when files (objects) are created, removed, or updated.
Example use cases include:
- Generating a PDF when someone uploads HTML
- Creating thumbnails when an image is uploaded
- Extracting text from a document
AWS SQS
AWS SQS (Simple Queue Service) lets you send, store, and receive messages between software components at any volume, without losing messages. To trigger an AWS Lambda function from an Amazon SQS queue, you need to configure an event source mapping that connects the queue to the function. AWS Lambda then automatically polls the SQS queue and invokes your function when messages are available.
This option is great when you have many Puppeteer tasks and don't want to overload your system. A typical workflow looks like this:
- Add messages to the queue (example: URL to screenshot)
- Lambda processes messages one by one or in batches
- Your app never waits; it just drops work in the queue
For more information, see How to Configure an AWS SQS Queue to Trigger a Lambda Function.
EventBridge / CloudWatch Rules
AWS EventBridge is a serverless event bus that routes events from AWS services, custom apps, and SaaS partners to various targets, using rules to filter and direct these events for building scalable, event-driven applications.
This method is best when you want Puppeteer to run on a schedule, such as:
- Generating daily website reports
- Creating weekly PDF exports, or
- Running hourly scraping tasks
For more information on how to set it up, see Creating rules in Amazon EventBridge.
Optimizing Performance when Deploying Puppeteer on AWS Lambda
Because Puppeteer depends on Chromium, which is a relatively large and resource-heavy browser engine, it's very important to prioritize performance when using it inside AWS Lambda, otherwise you may experience slow execution times, timeouts, or incur unnecessarily high costs.
Here, we'll talk about some of the things you should consider when optimizing performance for Lambda functions.
Cold Starts and How to Fix Them
A cold start is the delay that happens when a Lambda function hasn't been used in a while. This happens because AWS needs to:
- Find a server to run the function on
- Load the code and the Chromium browser
- And then start everything up
The bottleneck is that this process can take several seconds with Puppeteer, which isn't great if you need fast responses. However, there are two ways to reduce cold starts in Lambda:
- Provisioned Concurrency: This technique ensures that a specific number of Lambda instances are pre-initialized and ready to respond immediately. While this incurs an additional cost, it effectively eliminates "cold starts," making it well-suited for large, complex apps where speed is crucial.
- Keep-Warm Pings: Alternatively, you can set up a simple scheduled task (like a timer) that calls your function every few minutes just to say "hello" - to keep the function from falling asleep. It's cheaper than Provisioned Concurrency but less reliable if your traffic patterns change suddenly.
Memory Optimization
Memory is an important factor when running AWS Lambda functions. The more memory (CPU power) you assign to a Lambda function, the more speed and efficiency you get. For most Puppeteer tasks, the optimal range is usually between 2048MB and 3072MB. This sweet spot balances performance and cost without wasting resources.
To ensure maximum efficiency and avoid diminishing returns, always test different memory sizes to determine what works best for your specific use case, such as PDF generation or scraping.
Other Optimization Tips
- Always clean up the browser instance: Ensure your code always closes the browser (
browser.close()) in afinallyblock. Leaving browsers open wastes memory and can cause crashes. - Start with 2048MB: If you're not sure about the optimal memory settings, start with 2048MB. First, test run your function and check CloudWatch logs to see if you're using all that memory, then you can adjust up or down from there as necessary.
- Keep deployments lean: Only include what you need in your function package - extra files mean more to load during cold starts.
Common Issues and Troubleshooting
When running Puppeteer on AWS Lambda, it is very normal to encounter certain recurring problems, and understanding what typically causes them makes debugging much easier.
Here are some of the most common issues you might run into and their fixes.
| Issue | Solution |
|---|---|
Cannot find module | Ensure puppeteer-core is in dependencies not devDependencies; run npm install before zipping. |
Failed to launch browser | Increase memory to 1024 MB+ and verify that the Chromium layer is attached correctly and the architecture matches (x64/arm64). |
libnss3.so missing | Use @sparticuz/chromium or @sparticuz/chromium-min instead of the standard Chromium, which lacks Lambda deps. |
| Timeout errors | Set timeout to 60s+; use networkidle2 and add explicit waits like page.waitForNavigation(). |
| Blank/empty output | Ensure content is loaded before generating screenshots or PDFs. Use page.waitForSelector() to verify the required content exists and check console errors with page.on('console'). |
| Out of memory | Increase the Lambda function memory to 5120 MB, limit concurrent pages and close the browser promptly using browser.close(). |
| Version mismatch | Consult the Puppeteer-Chromium matrix to ensure you're installing compatible versions of puppeteer-core and @sparticuz/chromium-min or @sparticuz-chromium. |
Amazon CloudWatch Logs is a tool for tracking API calls and metrics that you can use to help debug your Lambda functions to see exactly where the function stops or fails. You can read more on how to configure CloudWatch to view your Lambda function logs in this guide.
Cost Considerations
AWS Lambda pricing is based mainly on how many times your function is called and how long it runs, combined with the amount of memory you assign to it, which together form what AWS calls GB-seconds. Puppeteer tasks, such as generating PDFs or screenshots, are usually short but relatively resource intensive, so understanding this pricing model helps you predict your monthly bill. Let's make this clearer using a real-life scenario.
Imagine that you are generating 100,000 PDFs per month, with each one taking about five seconds to complete, and the Lambda function is configured with 2048 MB of memory. AWS charges $0.0000000333 per 1ms for a server in us-east-1 with 2048 memory, therefore:
- Cost per ms (2048 MB): $0.0000000333
- Execution Time: 5,000 ms (5 seconds)
- Volume: 100,000 PDFs
- Result: 0.0000000333 x 5,000 x 100,000 = $16.65
However, AWS charges $0.20 per 1 million requests. So, 100,000 PDF generation requests / 1,000,000 x $0.20 = $0.02
Now, the best part is that AWS Lambda has a generous free tier that includes one million free requests per month and 400,000 GB-seconds of compute time per month, usable for functions powered by both x86 and Graviton2 processors.
- Request Savings: Since you only have 100,000 requests, this charge is completely covered ($0).
- Compute Savings:
- Your total compute: 100,000 x 5s x (2048MB / 1024MB) = 1,000,000 GB-seconds.
- Billable GB-seconds: 1,000,000 - 400,000 free = 600,000 GB-seconds.
- Cost for billable duration: 600,000 x 0.0000166667 (standard GB-s rate) = $10.00.
Thus, your actual monthly cost would be approximately $10.00.
If you need an estimate of how much you'd be paying for using Lambda, you can use the AWS Pricing Calculator to determine your running cost in a single estimate.
Why You Might Want to Use a PDF Generation API
When you're deploying Puppeteer on AWS Lambda to generate PDFs, you can spend weeks dealing with package size limits, cold starts, and optimising your configuration for the best cost/performance balance. Or you can use a dedicated PDF Generation API that already handles these issues.
DocuPotion is designed exactly for this:
- Describe your PDF to our AI editor and get a ready-to-use template
- Use our battle-tested API to generate your PDFs with just a few lines of code
- Predictable billing based on usage
- No need to worry about maintaining your own infrastructure for PDF generation
Here's how simple it is to generate a PDF with DocuPotion:
const response = await fetch('https://api.docupotion.com/v1/create', {
  method: 'POST',
  headers: {
    'Authorization': 'Bearer YOUR_API_KEY',
    'Content-Type': 'application/json'
  },
  body: JSON.stringify({
    templateId: 'your_template_id',
    output: 'url',
    data: {
      name: 'John Doe',
      invoice_number: 'INV-001'
    }
  })
});

const { url } = await response.json();
console.log('PDF URL:', url);
No Lambda functions, no Chromium binaries, no cold starts. Just a simple API call.
Summary
We covered a lot in this article, but hopefully it was useful. You've now seen how to deploy Puppeteer on AWS Lambda and the challenges that come with it.
Here's the quick recap:
- ⚠️ Deploying Puppeteer on Lambda is tricky because of package size limits (50MB zipped, 250MB unzipped), missing system dependencies, and cold starts.
- 📦 Use
puppeteer-corepaired with@sparticuz/chromium-minto get a Lambda-compatible Chromium binary that fits within the size constraints. - 🧱 Lambda Layers let you share dependencies across multiple functions, while Direct S3 Bundles give you self-contained deployments.
- ☁️ Save generated PDFs to S3 and return presigned URLs to avoid Lambda's 6MB response limit.
- ⚡ Trigger your function via API Gateway for HTTP requests, S3 events for file uploads, SQS for queued tasks, or EventBridge for scheduled jobs.
- 🚀 Optimize performance by tuning memory (2048-3072MB), using Provisioned Concurrency to eliminate cold starts, and always closing browser instances.
This guide focused on getting Puppeteer running on Lambda. For a deeper dive into Puppeteer itself — including headers, footers, custom fonts, and print styles — check out our complete guide to generating PDFs with Puppeteer.
And if you'd rather skip the infrastructure headaches entirely, our PDF generation API handles all the hard parts for you — no Lambda layers, no Chromium binaries, no cold starts. Just POST your JSON and get a PDF back in seconds, so you can focus on your documents instead of your deployment pipeline.