Introduction
Puppeteer is a Node.js library that provides a high-level API to control headless Chrome or Chromium browsers. Basically, it allows you to automate anything you can do manually in a browser such as navigating pages, interacting with elements, capturing screenshots or PDFs, and more.
By default, it runs in a headless-mode with no visible UI, making it a popular choice for server-side operations. However, it can also be configured to run visibly in a browser, for debugging or demonstration purposes.
There are several packages and tools that can be used to generate PDFs from web content, but Puppeteer stands out due to its ability to handle and render complex modern CSS, dynamic elements, JavaScript, and animations exactly as a real browser would.
In this comprehensive guide, we'll walk you through everything you need to know about PDF generation with Puppeteer, from basic setup to advanced PDF generation techniques and more. Let's get started!
Quickstart: Generate your first PDF with Puppeteer
Before you proceed, ensure you have at least Node 18 installed on your computer.
Next, create a new project directory and initialize it with npm init -y.
Before installing Puppeteer, it's important to note that Puppeteer consists of two different packages:
puppeteer: This is a self-contained solution used for browser automation. When installed, it downloads a recent version of Chrome (~170MB macOS, ~282MB Linux, ~280MB Windows) and achrome-headless-shellbinary in your $HOME path, making it ideal for PDF generation and several automation workflows.puppeteer-core: This is an alternative package that is used when you're connecting to a remote browser instance or when a browser is already present in your environment (like in a Docker container). It's essentially a lightweight version that does not download a browser and requires you to manage the browser executable yourself.
To install puppeteer, run:
npm install puppeteerHere's a basic script to generate a PDF with Puppeteer:
const puppeteer = require('puppeteer');
(async () => {
  const browser = await puppeteer.launch();
  const page = await browser.newPage();
  await page.goto('https://pptr.dev/', { waitUntil: 'networkidle2' });
  await page.pdf({ path: 'pptr.pdf', format: 'A4' });
  await browser.close();
})();
Let's go through what's going on in the snippet above:
- The
puppeteer.launch()method starts a new Chromium instance in headless mode by default. - Since each browser can have multiple tabs (pages), we create a fresh one using
browser.newPage(). - Next, we navigate to the specified URL using
page.goto()and wait until the network is idle (no more than 2 connections for 500ms). page.pdf(options)then generates the PDF and saves it locally to the specified path using A4 paper format.- Finally, we shut down the browser using
browser.close()to prevent memory leaks and free up system resources.
This is a pretty simple example of generating a PDF of a webpage using Puppeteer. In the next sections, we'll go deeper into the techniques you can use to implement production-ready PDF generation solutions with Puppeteer.
Generating PDFs From Different Sources
In the previous example, you'd notice we generated the PDF file from a web page. However, Puppeteer excels at converting various sources into PDFs, leveraging Chrome's rendering engine for accurate results. The two primary methods are generating PDFs from URLs (for existing web pages) and HTML strings (for custom-generated content).
Generating a PDF from a URL
This is the most common use case of PDF generation with Puppeteer. It uses the page.goto() method of the Page class to load a remote web page. This is perfect for creating printable versions of web content, archiving pages, or generating documentation from your web application.
To demonstrate, create a file named generate.js and add the following code to it:
const puppeteer = require('puppeteer');
async function generatePDFFromURL(url, outputPath) {
const browser = await puppeteer.launch();
const page = await browser.newPage();
await page.goto(url, { waitUntil: 'networkidle0' });
await page.pdf({
path: outputPath,
format: 'A4',
printBackground: true
});
await browser.close();
console.log("PDF saved to " + outputPath);
}
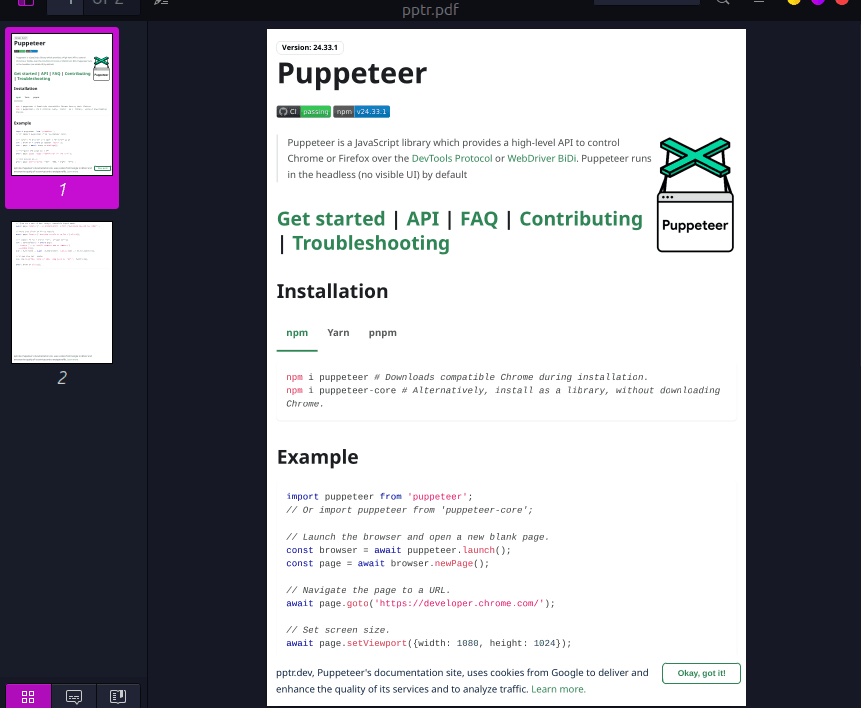
generatePDFFromURL('https://pptr.dev/', 'pptr.pdf');Run the script using node generate.js and you should see the generated PDF file as shown below:
Generating a PDF from an HTML string
Aside from generating PDFs from web pages, we can also generate PDFs from HTML strings using the page.setContent() method. This option can be useful for scenarios where you need to generate dynamic content on the server such as reports, newsletters, customer data, and so on.
Here is an example HTML string:
let string_of_html = `
  <section>
  <h1>Generate PDFs with Puppeteer</h1>
  <h2>Introduction</h2>
  <p>Content...</p>
  </section>
`;
And here's a complete example to generate PDF using HTML string with Puppeteer:
const puppeteer = require('puppeteer');
async function generatePDFFromHTML(htmlContent, outputPath) {
const browser = await puppeteer.launch();
const page = await browser.newPage();
// Set the HTML content directly
await page.setContent(htmlContent, { waitUntil: 'networkidle0' });
await page.pdf({
path: outputPath,
format: 'A4',
margin: { top: '50px', right: '50px', bottom: '50px', left: '50px' }
});
await browser.close();
}
// Example HTML for a simple report
const reportHTML = `
<!DOCTYPE html>
<html>
<head>
<style>
body {
font-family: Arial, sans-serif;
font-size: 14px;
}
table {
width: 100%;
border-collapse: collapse;
margin-bottom: 20px;
}
th, td {
border: 1px solid #000;
padding: 8px;
}
th {
text-align: left;
}
</style>
</head>
<body>
<h1 style="text-align:center;">Monthly Sales Report</h1>
<p style="text-align:center;">
Generated on: \${new Date().toLocaleDateString()}
</p>
<h2>Summary</h2>
<table>
<tr>
<th>Total Sales</th>
<td>$125,430</td>
</tr>
<tr>
<th>Growth</th>
<td>15%</td>
</tr>
</table>
<h2>Top Products</h2>
<table>
<tr>
<th>Product</th>
<th>Revenue</th>
</tr>
<tr>
<td>Product A</td>
<td>$45,200</td>
</tr>
<tr>
<td>Product B</td>
<td>$38,750</td>
</tr>
<tr>
<td>Product C</td>
<td>$41,480</td>
</tr>
</table>
</body>
</html>
`;
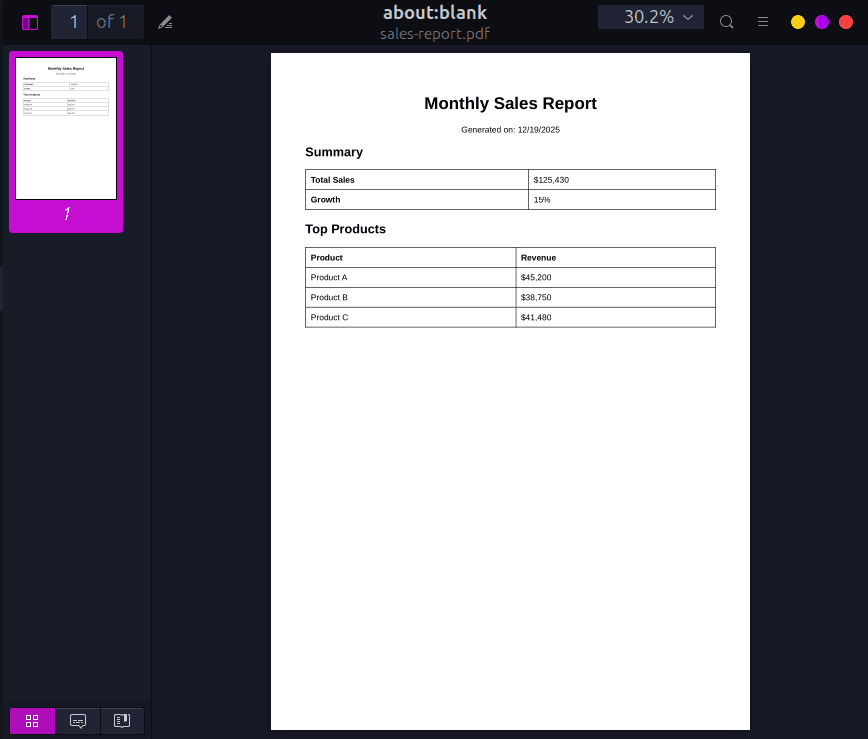
generatePDFFromHTML(reportHTML, 'sales-report.pdf');In the above code, notice the margin option in page.pdf() which sets top, right, bottom, and left padding to 50px each. This is one of the options we can use to customize the appearance of the generated PDF. We'll dive deeper into this in a bit.
Here's what the generated PDF looks like:
Puppeteer PDF Options Configurations
When generating a PDF with Puppeteer, the page.pdf() method gives us several options to customize how the final PDF looks and behaves.
Some of the most commonly used options are highlighted below.
| Option | What it does | Type | Default |
|---|---|---|---|
path | Where to save the file (if omitted, returns a Buffer) | string | undefined |
format | Set the paper format like 'A4', 'Letter', 'Legal', 'Tabloid', 'Ledger', 'A0'-'A6' | string | 'A4' |
width / height | Set custom paper dimensions (overrides format). For example, '8.5in', '11in', or numbers in px | string/number | undefined |
margin | Used for setting the PDF margins | object | All sides set to 0 by default |
printBackground | Specifies whether to include background colors and images | boolean | false |
landscape | Specifies whether to print the PDF in horizontal orientation | boolean | false (portrait) |
scale | Scales the rendering of the web page. Valid values are between 0.1 and 2. | number | 1 |
pageRanges | Specifies the page ranges to print. For example, '1-5,8' | string | '' (Empty string, meaning all pages will be printed) |
displayHeaderFooter | Specifies whether to show header and footer | boolean | false |
headerTemplate | The HTML string to use for the PDF header. | string | |
footerTemplate | The HTML string to use for the PDF footer. | string |
Here's a snippet showing some of the configuration options:
await page.pdf({
  path: 'sales-report.pdf',
  format: 'A4',
  landscape: true,
  printBackground: true,
  margin: {
    top: '100px',
    right: '50px',
    bottom: '100px',
    left: '50px'
  },
  scale: 0.9,
  displayHeaderFooter: false,
});
Adding Headers and Footers to PDFs generated with Puppeteer
It's common to see PDFs with headers and footers providing additional information or context about the document. They are useful for adding branding content such as logos and titles, metadata such as page numbers and version, references, and other contents.
To add headers and footers to the generated PDF, we must set displayHeaderFooter: true in the page.pdf() options. Note that headers and footers are injected separately from the page content, meaning they cannot see the page's CSS - we must provide self-contained HTML and inline styles.
Puppeteer looks for specific HTML classes within the HTML string and automatically injects data into them. The required classes are the following:
.date: The formatted date of when the print was initiated..title: The document title (usually the<title>of the source HTML)..url: The URL/path of the document..pageNumber: The current page number..totalPages: The total number of pages in the generated PDF.
For the headers and footers to show up, we must set a margin in the options, otherwise they will be hidden behind the page content.
Let's look at an example that adds a header "Puppeteer docs" and footer to the PDF generated from this URL: https://pptr.dev/guides/page-interactions.
const puppeteer = require('puppeteer');
async function generatePDFFromURL() {
const browser = await puppeteer.launch();
const page = await browser.newPage();
await page.goto("https://pptr.dev/guides/page-interactions", { waitUntil: 'networkidle0' });
await page.pdf({
path: 'docs.pdf',
format: 'A4',
// Increase margins for header & footer
margin: {
top: '90px',
right: '50px',
bottom: '70px',
left: '50px'
},
displayHeaderFooter: true,
// Header
headerTemplate: `
<div style="
width: 100%;
background-color: #0b3c6d;
color: white;
font-size: 24px;
padding: 10px 0;
text-align: center;
">
<strong>Puppeteer Docs</strong>
</div>
`,
// Footer
footerTemplate: `
<div style="
width: 100%;
font-size: 10px;
text-align: center;
color: #555;
">
Page <span class="pageNumber"></span> of <span class="totalPages"></span>
</div>
`,
printBackground: true
});
await browser.close();
}
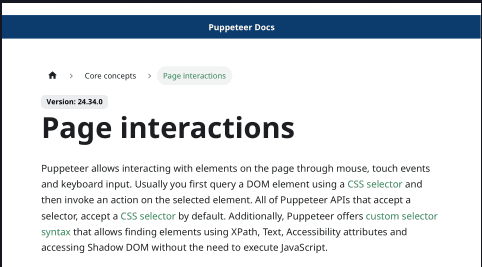
generatePDFFromURL();You can see the header and footer highlighted in the screenshot below:

Notice the background-color: #0b3c6d; declaration didn't take effect on the header despite adding printBackground: true in the options. This is because page.pdf() by default generates a PDF with modified colors for printing. We need to use the -webkit-print-color-adjust property to force rendering of exact colors:
headerTemplate: `
  <style>
    html {
      -webkit-print-color-adjust: exact;
    }
  </style>
  <div style="
    width: 100%;
    background-color: #0b3c6d;
    color: white;
    font-size: 14px;
    padding: 10px 0;
    text-align: center;
  ">
    <strong>Acme Stores</strong>
  </div>
`,
Now we can see the background color behind the header:
Waiting For Content to Load
When generating PDFs with Puppeteer, it's common to wait for specific elements to finish loading before letting Puppeteer generate the document to avoid blank or incomplete content. This is especially important for Single Page Applications (SPAs), lazy-loaded content, and pages that rely on JavaScript to render.
To achieve this, there are various methods we can use. The page.goto() and page.setContent() methods accept an option called waitUntil. The option accepts any of the following values:
load: After window.load event.domcontentloaded: After DOM is parsed.networkidle0: No connections for 500ms.networkidle2: At most 2 connections for 500ms.
However, for accuracy, the most reliable method is to use page.waitForSelector() (for elements) or page.waitForTimeout() (for delays).
Here's an example showing the different methods:
async function generateReportWithChart() {
  const browser = await puppeteer.launch();
  const page = await browser.newPage();

  await page.goto('https://dashboard.example.com/sales', {
    waitUntil: 'networkidle0'
  });

  // Wait for the chart canvas to be visible
  await page.waitForSelector('.chart canvas', {
    visible: true,
    timeout: 10000
  });

  // Additional wait to ensure animations complete
  await page.waitForTimeout(2000);

  await page.pdf({ path: 'sales-report.pdf' });
  await browser.close();
}
Figuring out the right set of methods that ensures your content will load fully is one of the trickiest parts of generating PDFs with Puppeteer. It will likely take some experimentation before you hit on the right mix of methods.
Handling Custom Fonts
Puppeteer supports adding custom fonts to ensure your PDF documents look consistent and render correctly across different platforms and devices. By default, Puppeteer relies on system fonts, which can lead to unexpected visual differences if a font is missing on the machine generating the PDF. To avoid this, we can explicitly define and embed custom fonts.
There are two common ways to add custom fonts to PDFs generated with Puppeteer:
- Using web fonts
- Using local fonts
Using web fonts
This involves using the @font-face CSS rule to load a custom web font in a CSS file and adding it to Puppeteer using the page.addStyleTag() method.
First, create a CSS file (fonts.css) and define the custom font:
@font-face {
  font-family: "Inter";
  font-style: normal;
  font-weight: 400;
  font-display: swap;
  src: url("https://fonts.gstatic.com/s/inter/v12/UcCO3FwrK3iLTcviYw.woff2") format("woff2");
}

body {
  font-family: "Inter", Arial, sans-serif;
}
Next, we load the CSS file in Puppeteer before generating the PDF:
await page.addStyleTag({ path: './fonts.css' });To ensure the font is accessible at render time for Puppeteer to use, we can use the networkidle0 option to ensure the font is fully loaded before calling page.pdf():
await page.goto("https://website.com", {
    waitUntil: "networkidle0",
  });
Using local fonts
If your code is running in a server environment with restricted internet access, you can load fonts directly from your local file-system. Simply place the font file (for example, a .ttf or .woff2 file) in your project folder and reference it using a relative or absolute path:
/* fonts.css */
@font-face {
  font-family: "Roboto";
  src: url("./fonts/Roboto-Regular.woff2") format("woff2");
  font-weight: 400;
  font-style: normal;
}

body {
  font-family: "Roboto", sans-serif;
}
CSS Print Styles
When generating PDFs with Puppeteer, it's important to define print-specific styles so your document is properly optimized for paper and PDF output. Print styles help to fine-tune how content is laid out when pages are rendered, ensuring the final PDF looks readable and professional.
CSS provides the @media print rule, which allows us to control layout, spacing, colors, visibility, and page breaks exclusively for printed content, without affecting how the page appears in the browser.
The properties include:
page-break-before: always;forces an element to start on a new pagepage-break-after: avoid;prevents a page break immediately after an elementbreak-inside: avoid;keeps an element's contents together on the same page
These rules are especially helpful when working with structured content like tables. For example, applying break-inside: avoid to table rows helps prevent a row from being split across two pages, which can otherwise make PDFs hard to read.
First, you'll need to create a CSS file containing the styles:
/* print.css */
@media print {

  h1, h2, h3 {
    page-break-after: avoid;
  }

  /* Prevent table rows from splitting across pages */
  tr {
    break-inside: avoid;
    page-break-inside: avoid;
  }

  /* Force a new page when needed */
  .page-break {
    page-break-before: always;
  }
}
Then inject the stylesheet using page.addStyleTag():
await page.setContent(htmlContent, { waitUntil: 'networkidle0' });


await page.addStyleTag({ path: './print.css' });

await page.pdf({
  path: 'report.pdf',
  format: 'A4',
  printBackground: true
});
Generating PDFs at Scale
When generating PDFs with Puppeteer, each render involves initializing multiple components: the Chromium browser engine, DOM parser and layout engine, image decoders, JavaScript runtime, and the DevTools Protocol. While this approach provides excellent flexibility, it also comes with a significant trade-off in high CPU and memory consumption.
To manage the high resource consumption, there are a few strategies we can adopt.
DocuPotion tip: Concurrency tuning, browser pooling, and memory leak hunting are the parts of running Puppeteer in production that quietly consume the most engineering time. If you'd rather not own that, our PDF generation API handles the scaling, retries, and Chromium lifecycle for you. Start free with 50 PDFs, no credit card required.
1. Optimize Puppeteer Launch Arguments
To optimize performance, we can pass configuration options to puppeteer.launch(). These options allow us to reduce Chromium's overhead by disabling unnecessary features at startup.
const browser = await puppeteer.launch({
  args: [
    "--no-sandbox",              // Required in many container/serverless environments
    "--disable-setuid-sandbox",
    "--disable-gpu",             // GPU is unnecessary for PDF rendering
    "--disable-dev-shm-usage",   // Prevents shared memory issues in Docker
  ],
});
2. Reuse Browser Instances
Launching Chromium is expensive. Spawning a new browser for every PDF request is one of the most common scalability mistakes. Instead, launch one browser instance and create a new page for each PDF using browser.newPage():
// Singleton browser instance
let browserInstance = null;

async function getBrowser() {
  if (!browserInstance) {
    browserInstance = await puppeteer.launch({
      headless: true,
      args: ['--no-sandbox', '--disable-setuid-sandbox']
    });
  }
  return browserInstance;
}

async function generatePDF(content) {
  const browser = await getBrowser();
  const page = await browser.newPage();

  await page.setContent(content);
  const pdfBuffer = await page.pdf();

  // Close page to free memory
  await page.close();

  return pdfBuffer;
}
3. Memory Management and Concurrency Limit
Always close pages (page.close()) after generating PDFs to prevent memory leaks - Puppeteer does not automatically reclaim resources if pages are left open. Additionally, use try/finally blocks to ensure cleanup even on errors:
let page;
try {
  page = await browser.newPage();
  // generate PDF
} finally {
  if (page) await page.close();
}
Also, running too many pages or browsers in parallel can overwhelm CPU and memory, causing slowdowns or crashes. To avoid this, limit the number of concurrent PDF jobs per instance and scale horizontally by running multiple workers instead of increasing concurrency on a single machine.
A common rule of thumb is to run 2–4 concurrent pages per browser, depending on page complexity and available resources.
Common Issues and Fixes
When generating PDFs with Puppeteer, it's common to run into a few issues with layout and rendering of the document. Below, we highlight some of the issues you may encounter, along with solutions to resolve them.
Output PDF is blank
This usually happens when the page content hasn't fully loaded before the PDF is generated. To fix it:
- Use
waitUntil: 'networkidle0'when loading content - Explicitly wait for a key element using
page.waitForSelector() - Increase navigation or operation timeouts if necessary
Missing background colors
This happens because Puppeteer disables background graphics by default when printing. To fix it, enable background rendering when generating the PDF and use the -webkit-print-color-adjust property to force rendering of exact colors:
await page.pdf({ printBackground: true });Incorrect or Missing Fonts
Sometimes custom fonts may not finish loading or are unavailable in the runtime environment due to connection issues or some other reasons. To ensure fonts render correctly:
- Wait for all network requests to complete using
networkidle0 - Embed the fonts correctly using
@font-face - Install required system fonts on the server or container
Header/Footer Not Showing
This usually happens because headers and footers rendering is disabled by default, or there's no space reserved for them. To fix it:
Enable headers and footers explicitly:
await page.pdf({
  displayHeaderFooter: true
})
Add top and bottom margins to make room for them:
await page.pdf({
  margin: {
    top: '100px',
    right: '50px',
    bottom: '100px',
    left: '50px'
  },
})
Content cut off
Content being cut off in the generated PDF is usually a layout issue rather than a rendering bug. It typically happens when margins, scaling, or page-breaking rules are not properly configured, causing elements to overflow the printable area or be split in unexpected places. To fix it:
- Adjust margins and scale to leave enough space for the page content, especially when using headers and footers.
- Use CSS page-break rules to control how content flows across pages.
Timeout errors
Timeout errors occur when the network request is slow (such as external API requests), the page contains heavy assets and complex layouts, or when Puppeteer waits indefinitely to download resources hosted on blocked or unavailable domains. This can be fixed by:
- Increasing the default timeout using
page.setDefaultTimeout(60000)(60 seconds). - Increasing navigation-specific timeouts:
await page.goto(url, { timeout: 60000, waitUntil: 'networkidle0' });- Waiting for specific elements instead of the entire network. For instance, you may only need to generate a PDF from a specific section of a page - so you can specifically wait for that element to load and then generate the PDF:
await page.waitForSelector('#report-content');Deployment Configurations
As mentioned earlier, Puppeteer relies on a full Chromium browser to render pages, which makes deployment more involved than typical Node.js services. Chromium alone can be ~300MB, so planning for storage, memory, and startup time is essential, especially in production environments.
For a step-by-step walkthrough of the AWS Lambda case specifically, including layer sizing, cold start tuning, and font handling, see our dedicated guide on how to deploy Puppeteer on AWS Lambda.
For example, most serverless environments (AWS Lambda, Cloud Functions, Vercel) impose strict deployment size limits, making it impractical to ship Puppeteer with its bundled Chromium. To overcome this, packages like @sparticuz/chromium provide a lightweight, serverless-compatible Chromium build that works within these constraints. The recommended approach in serverless environments is to:
- Use
puppeteer-coreinstead ofpuppeteer - Provide a custom Chromium binary optimized for serverless
- Pass the correct launch arguments and executable path at runtime
Here's example code showing how to use Puppeteer in a serverless environment:
import { launch } from "puppeteer-core";
import chromium from "@sparticuz/chromium";

export async function generatePDF(url) {
  const browser = await launch({
    args: chromium.args,
    executablePath: await chromium.executablePath(),
    headless: chromium.headless,
    defaultViewport: chromium.defaultViewport,
  });

  const page = await browser.newPage();

  await page.goto(url, { waitUntil: "networkidle2" });

  const pdfBuffer = await page.pdf({
    format: "A4",
    printBackground: true,
  });

  await browser.close();

  return pdfBuffer;
}
In non-serverless environments (local development, dedicated servers, or VMs), using the full puppeteer package is better:
const puppeteer = require('puppeteer');

(async () => {
  const browser = await puppeteer.launch({
    args: ["--no-sandbox", "--disable-setuid-sandbox"],
  });

  const page = await browser.newPage();
  await page.goto("https://example.com", { waitUntil: "networkidle0" });
})();
When to use a third-party PDF API solution
Puppeteer is a fantastic tool. It has great flexibility and control, but self-hosting it comes with maintenance overhead and operational costs. You'll be responsible for many things including updating dependencies, managing crashes and memory leaks, handling scaling and retries, and maintaining infrastructure and deployment pipelines.
As your project scales and PDF generation volume increases, this overhead and operational burden can quickly outweigh the benefits. At this point, you may consider using a third-party PDF generation solution. There are several services that automate PDF generation and management, allowing you to focus on other parts of your application instead of struggling with maintenance and scalability. These platforms offer several advantages including reliability, usage-based pricing, and more.
DocuPotion is one such example. DocuPotion lets you describe your PDF to a visual template editor that builds a reusable template. You can then automate your PDF production using the DocuPotion API.
Frequently Asked Questions
Is Puppeteer free to use?
Yes! Puppeteer is open-source under the Apache 2.0 license. You can use it commercially without any fees. The bundled Chromium is also free.
Can Puppeteer generate multi-page PDFs?
Puppeteer automatically paginates content based on paper size. You can control pagination with CSS properties like page-break-before, page-break-after, and break-inside.
What's the difference between Puppeteer and Playwright for PDFs?
Both Puppeteer and Playwright can generate PDFs using Chromium, but they differ in scope and ecosystem.
- Puppeteer was developed by Google's Chrome DevTools team and released in 2017. Puppeteer provides a straightforward API for tasks like PDF generation, screenshots, and automation. It's often the go-to choice when your primary goal is generating PDFs from HTML with minimal setup.
- Playwright was developed by Microsoft and released in 2020. Playwright supports multiple browser engines (Chromium, Firefox, and WebKit) for certain tasks and offers more advanced testing features, such as auto-waiting and better cross-browser consistency. PDF generation is only available with Chromium, similar to Puppeteer.
If Playwright sounds like a better fit for your use case, we have a separate walkthrough on how to generate PDFs with Playwright.
Can I run Puppeteer in the browser?
No. Puppeteer runs only in a Node.js environment.
Puppeteer controls a real browser (Chromium or Chrome) using low-level automation protocols, which require access to system resources that are not available in the browser sandbox.
How do I add page numbers in Puppeteer?
Puppeteer supports page numbering through the headerTemplate and footerTemplate options available in page.pdf(). Here's a simple example using a footer to display page numbers:
await page.pdf({
  path: 'document.pdf',
  format: 'A4',
  displayHeaderFooter: true,
  footerTemplate: `
    <div style="width: 100%; font-size: 10px; text-align: center; padding: 0 10px;">
      Page <span class="pageNumber"></span> of <span class="totalPages"></span>
    </div>
  `,
  margin: {
    bottom: '30px'
  }
});
In the snippet above, Puppeteer automatically replaces:
<span class="pageNumber"></span>with the current page number<span class="totalPages"></span>with the total number of pages
Skip the Puppeteer setup entirely
Puppeteer is powerful, but maintaining it in production is a meaningful engineering investment. You'll need to handle Chromium binaries, memory tuning, crash recovery, font handling, and scaling under load. If you'd rather not own that, our PDF generation API gives you the same Puppeteer-quality output through a single REST endpoint. Design your template once with a visual editor, then POST your JSON and get back a finished PDF in seconds, with no headless browser to manage.