Introduction
Zapier connects thousands of apps, which makes it the glue behind a huge number of small-team workflows. A form submission creates a CRM record, a new payment posts to Slack, a spreadsheet row kicks off an onboarding email. The pattern is always the same: something happens in one app, and Zapier reacts in another.
One step that comes up again and again is turning that data into a document. After a survey is submitted you might want a tidy feedback report. After a deal closes you might want a contract. After a payment lands you might want an invoice. In each case structured data goes in, and a clean, on-brand PDF needs to come out.
Zapier has no built-in way to generate a PDF, so the question is how to add one without writing code or babysitting infrastructure. In this guide we'll walk through the cleanest approach end to end using DocuPotion's Zapier integration. By the time you reach the bottom you'll have a Zap that turns trigger data into a branded PDF in a few minutes, and no developer is required at any point.
We'll use a customer feedback report as the worked example, but the exact same steps apply to invoices, quotes, certificates, contracts and any other document.
Prerequisites
To follow along, you'll need:
- A Zapier account on any plan that allows the apps you want to connect
- A DocuPotion account
- A trigger that produces the data you want in the document, for example a form submission, a new payment or a new CRM record
Generating PDFs in Zapier: your options
Before the walkthrough, it helps to know the choices, because Zapier does not generate PDFs on its own.
1. Fill a Google Docs template and export it
If you already use Google Workspace, you can keep your document as a Google Doc and use Zapier's Google Docs and Google Drive actions to copy it, replace placeholder text with values from your trigger, then export the copy as a PDF.
The appeal is familiarity. Anyone can edit the template in Google Docs. The drawbacks show up quickly at any volume: layout precision is limited, repeating sections like invoice line items need awkward workarounds, every run leaves a copy in Drive that you have to clean up, and multi-step Zaps like this consume more tasks. It works for the occasional internal letter, but transactional documents tend to outgrow it.
2. Use a dedicated document app (recommended)
A document app wraps PDF generation into a single Zapier action. You design the template once, connect the app with an API key, and a single step renders the finished PDF. There is nothing to host and no HTML to maintain by hand.
DocuPotion is a document automation tool built for exactly this. You build a reusable template with merge fields, and the Create a Document action fills it with data from your Zap and hands back a PDF. This is the approach we'll focus on for the rest of the guide.
Walkthrough: Generate PDFs in Zapier with DocuPotion
Here's the full flow, from a fresh account to a working PDF step inside a Zap. Designing the template is the only part that takes real thought. The Zapier wiring itself takes about five minutes.
Step 1: Create a DocuPotion account
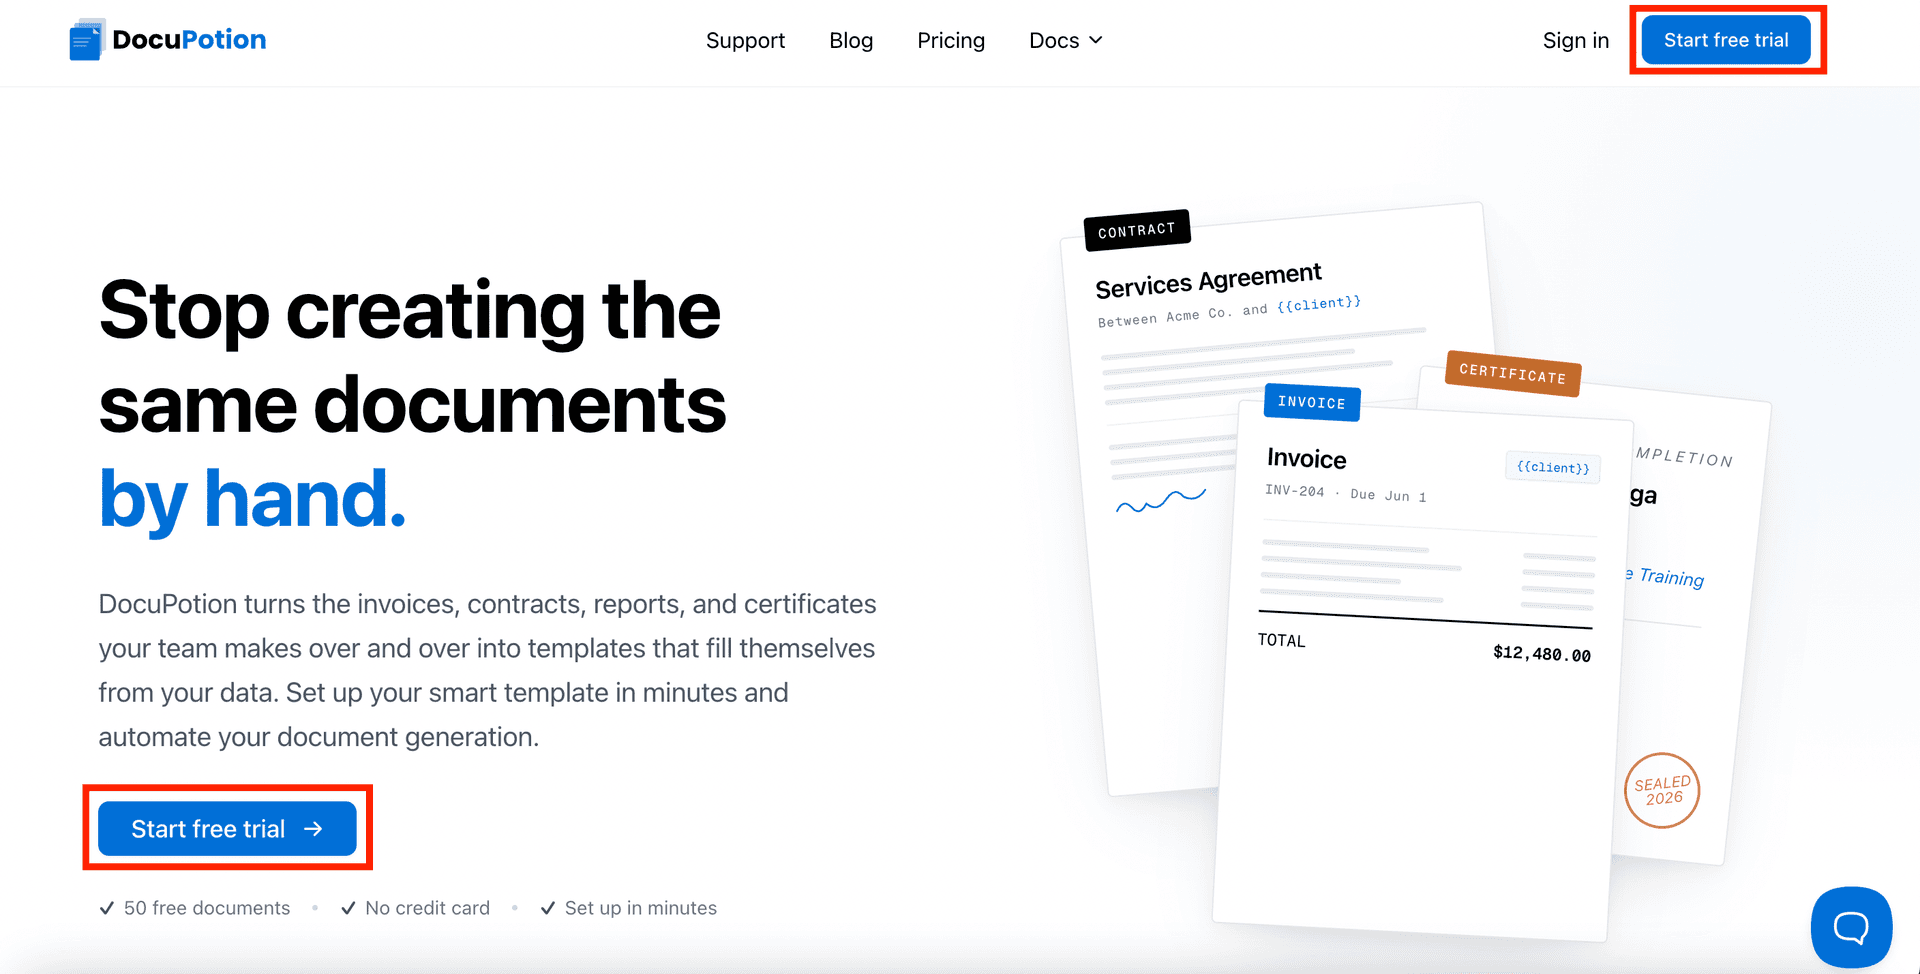
Head to docupotion.com and click the Start free trial button.
On the register page, choose Zapier when asked how you plan to use DocuPotion. The onboarding wizard routes you straight into the document editor so you can create your first template.
Step 2: Design your document template
DocuPotion's Template Editor is prompt-driven. Instead of dragging blocks onto a canvas, you describe the document you need in plain English and the editor builds the layout for you. No HTML knowledge and no developer needed.
Altenatively, you can use one of our pre-built library templates.
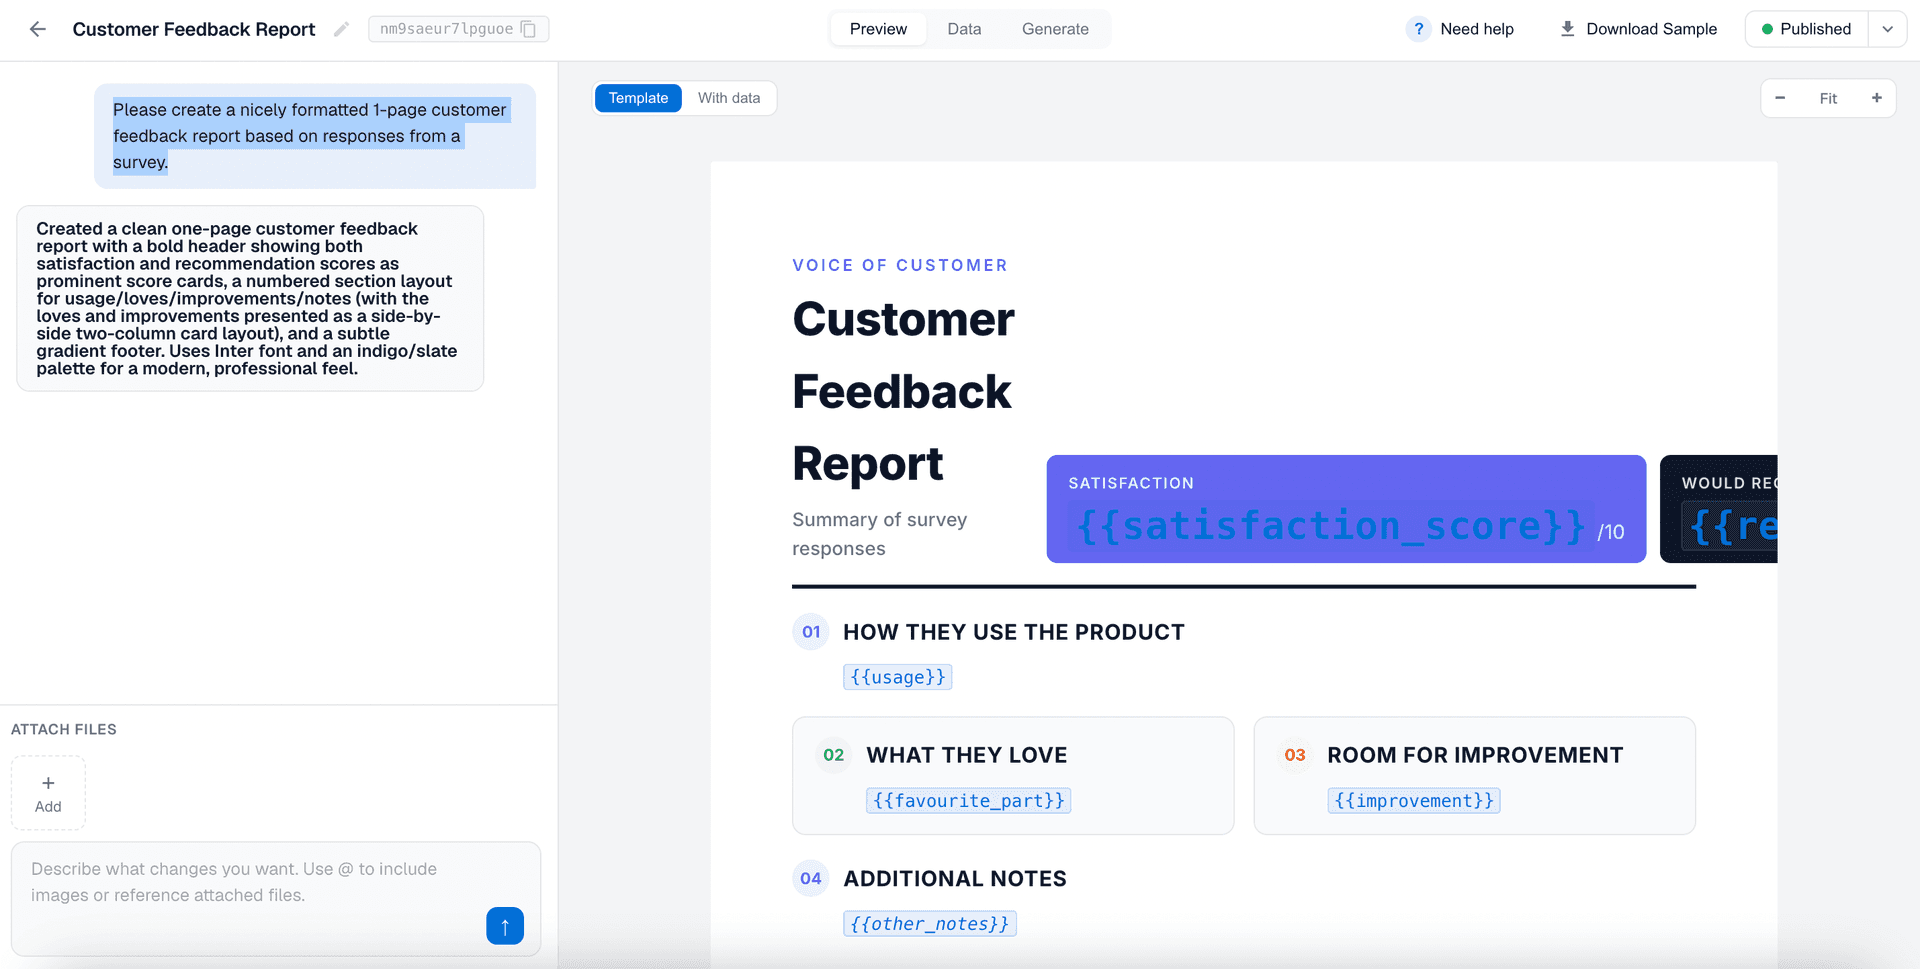
For our example, a prompt like "a clean one-page customer feedback report with the customer's name, how often they use the product, their favourite part, and any other notes" produces a first draft you can refine.
If you want to use an existing PDF file you have for your template, you can simply attach this to your initial prompt and tell the DocuPotion AI to 'Create a template based on the attached file.'
A few tips on using the DocuPotion editor:
- Refine with follow-up prompts. The editor remembers the conversation, so you can say things like "make the header more compact and move the logo to the right" or "add a section for a star rating." Small edits come back in a few seconds.
- Set up your merge fields. Anywhere dynamic data should appear, the editor inserts a
{{mustache}}variable, for example{{customer_name}},{{usage}},{{favourite_part}}and{{other_notes}}. You can see and edit these in the Data tab above the preview. - Preview with real-looking data. Toggle With data to render the template with the sample values from the Data tab. This is what your PDF will look like once Zapier sends real values in.
DocuPotion tip: If you already know which fields your Zap will send, list them in the Sample Data input when creating the template. For example "use these fields: customer_name, usage, favourite_part, other_notes." The editor binds them exactly and won't invent extras, so your template matches your Zapier data one to one.
When you're happy with the draft, click Publish in the top right. Only published versions of a template are used when Zapier generates a PDF, so you can keep tweaking the draft without affecting any live Zaps. Your Zap references the template by its Template ID (shown next to the template name at the top of the editor), and that ID never changes when you republish.
Step 3: Add the DocuPotion app to your Zap
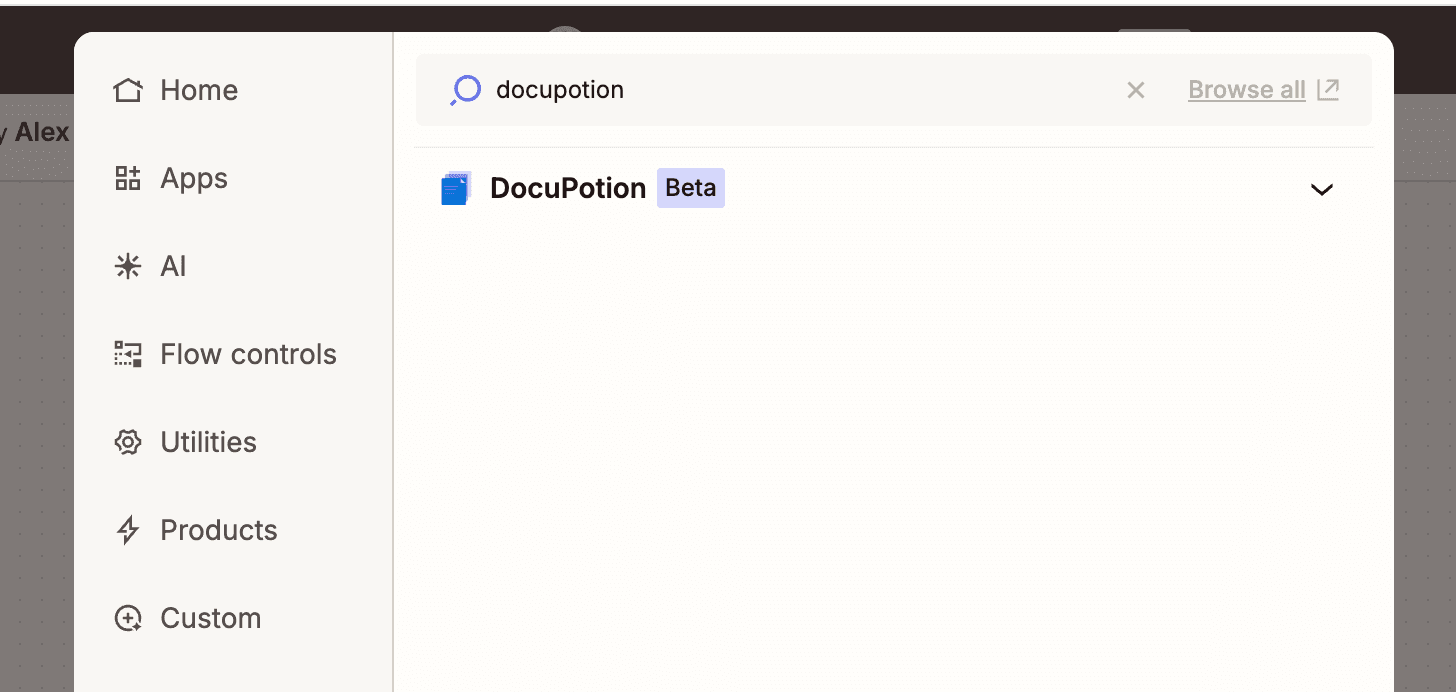
Switch over to Zapier and open a new or existing Zap. After your trigger step, add an action and search for DocuPotion.
Add the Create Document trigger to your Zap.
Step 4: Connect your DocuPotion account
Click Sign in and paste your DocuPotion API key into the window that appears. You'll find the key in the API Integration tab of your DocuPotion dashboard. Keep it private, it's the credential Zapier uses to authenticate.
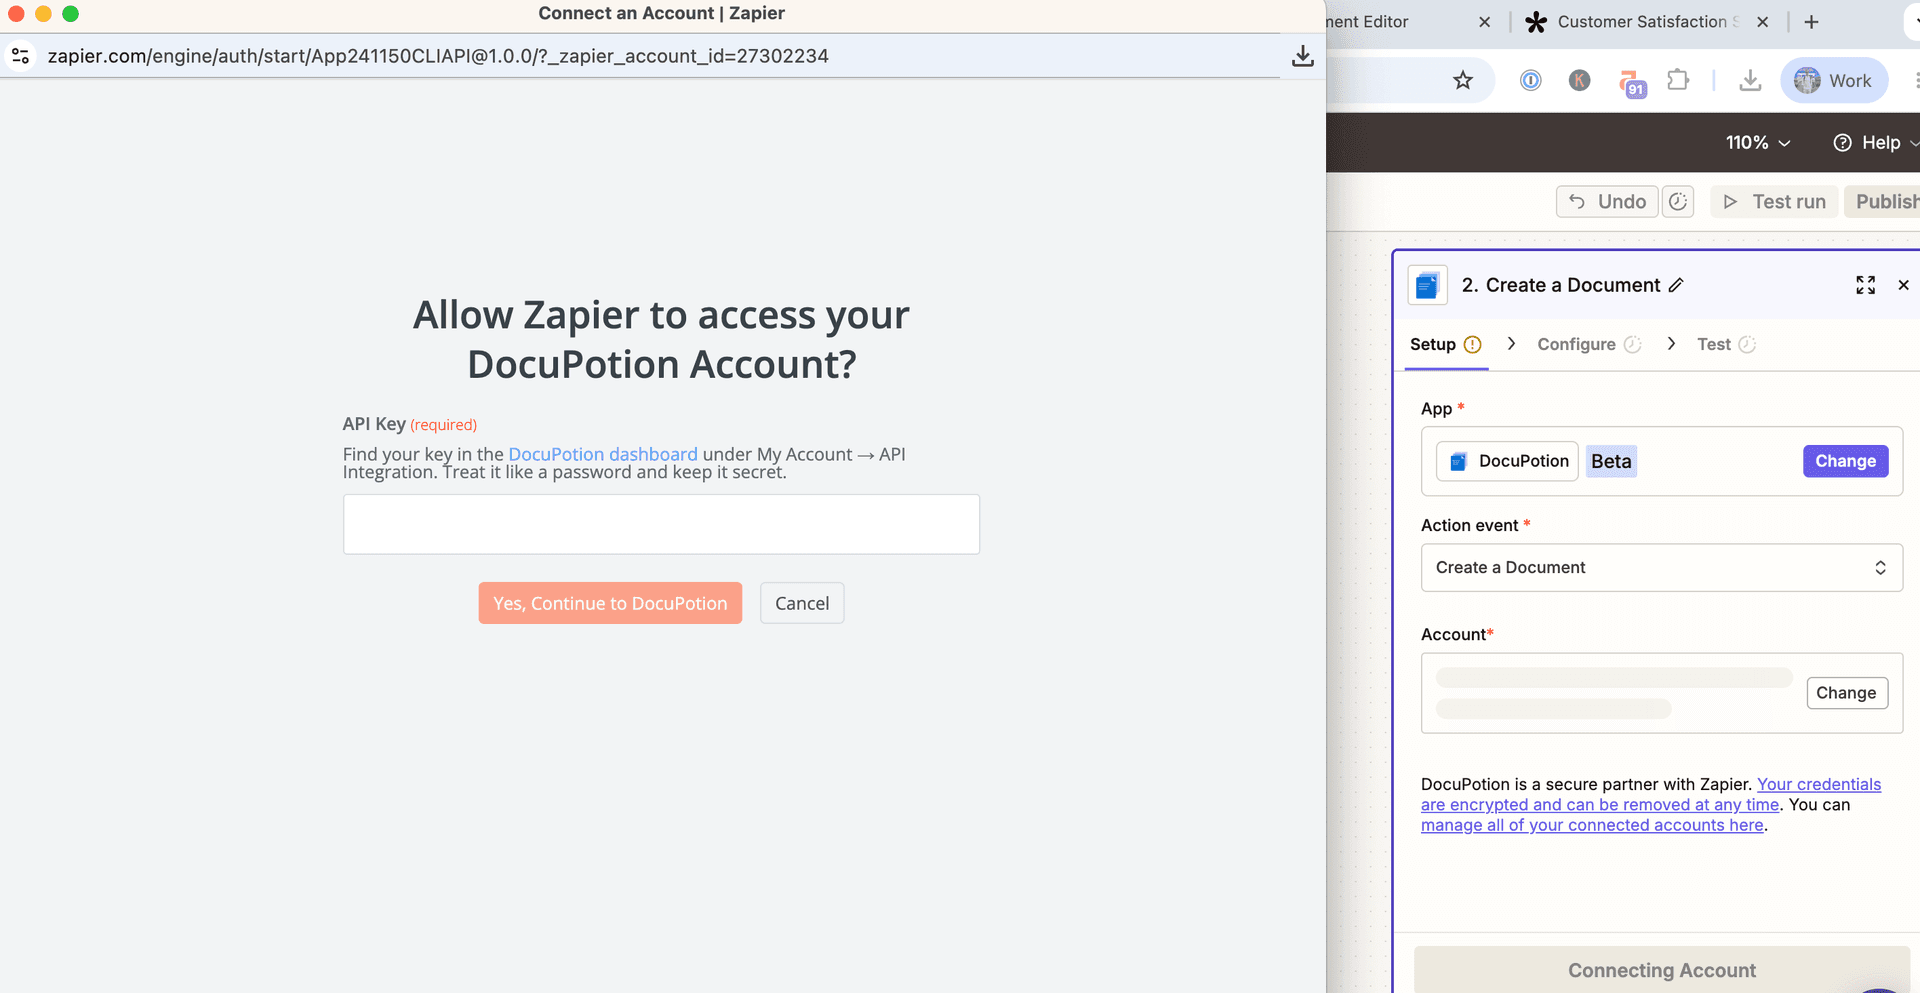
Once connected, you can select the DocuPotion account to use. Zapier reuses this connection across any DocuPotion steps, so you only do this once.
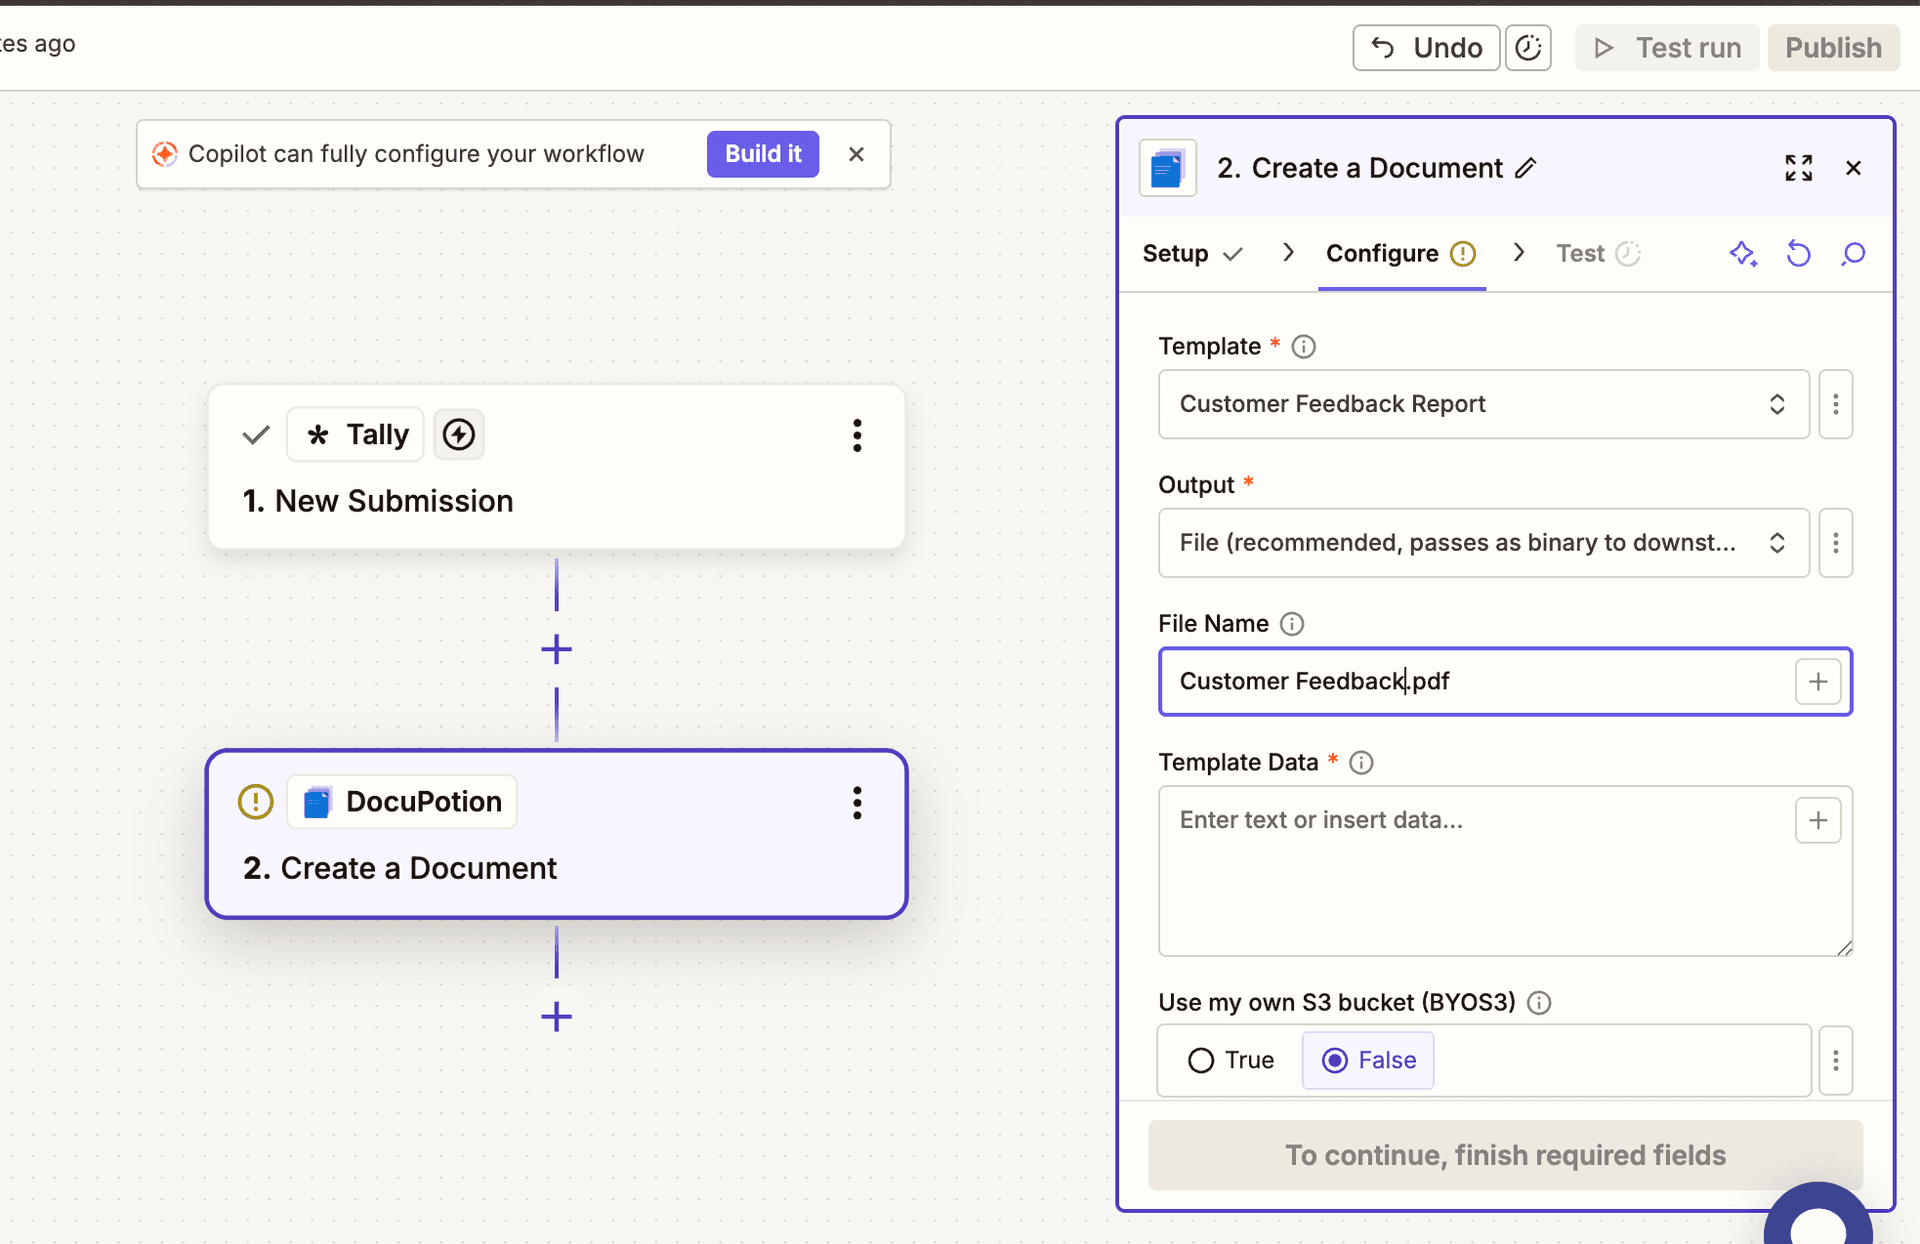
Step 5: Configure the Create a Document action
The action exposes four fields:
| Field | What to enter |
|---|---|
| Template | Choose one of your DocuPotion templates from the dropdown |
| Output | File, URL or base64. File is recommended because it hands Zapier a binary file you can email, upload or pass to any other step |
| File Name | The filename for the generated PDF, for example Customer Feedback -{{customer_name}}.pdf |
| Template Data | A JSON object with values for every merge field in your template (covered below) |
Step 6: Map your data to the template
The Template Data field is where the mapping happens. The easiest way to get it right is to open the Data tab in your DocuPotion editor and copy the sample JSON, which already matches the structure your template expects.

Paste that JSON into the Template Data field, then replace each static value with data from a prior step in your Zap. In the example below we're pulling responses from a form submission, but it works the same with any trigger.
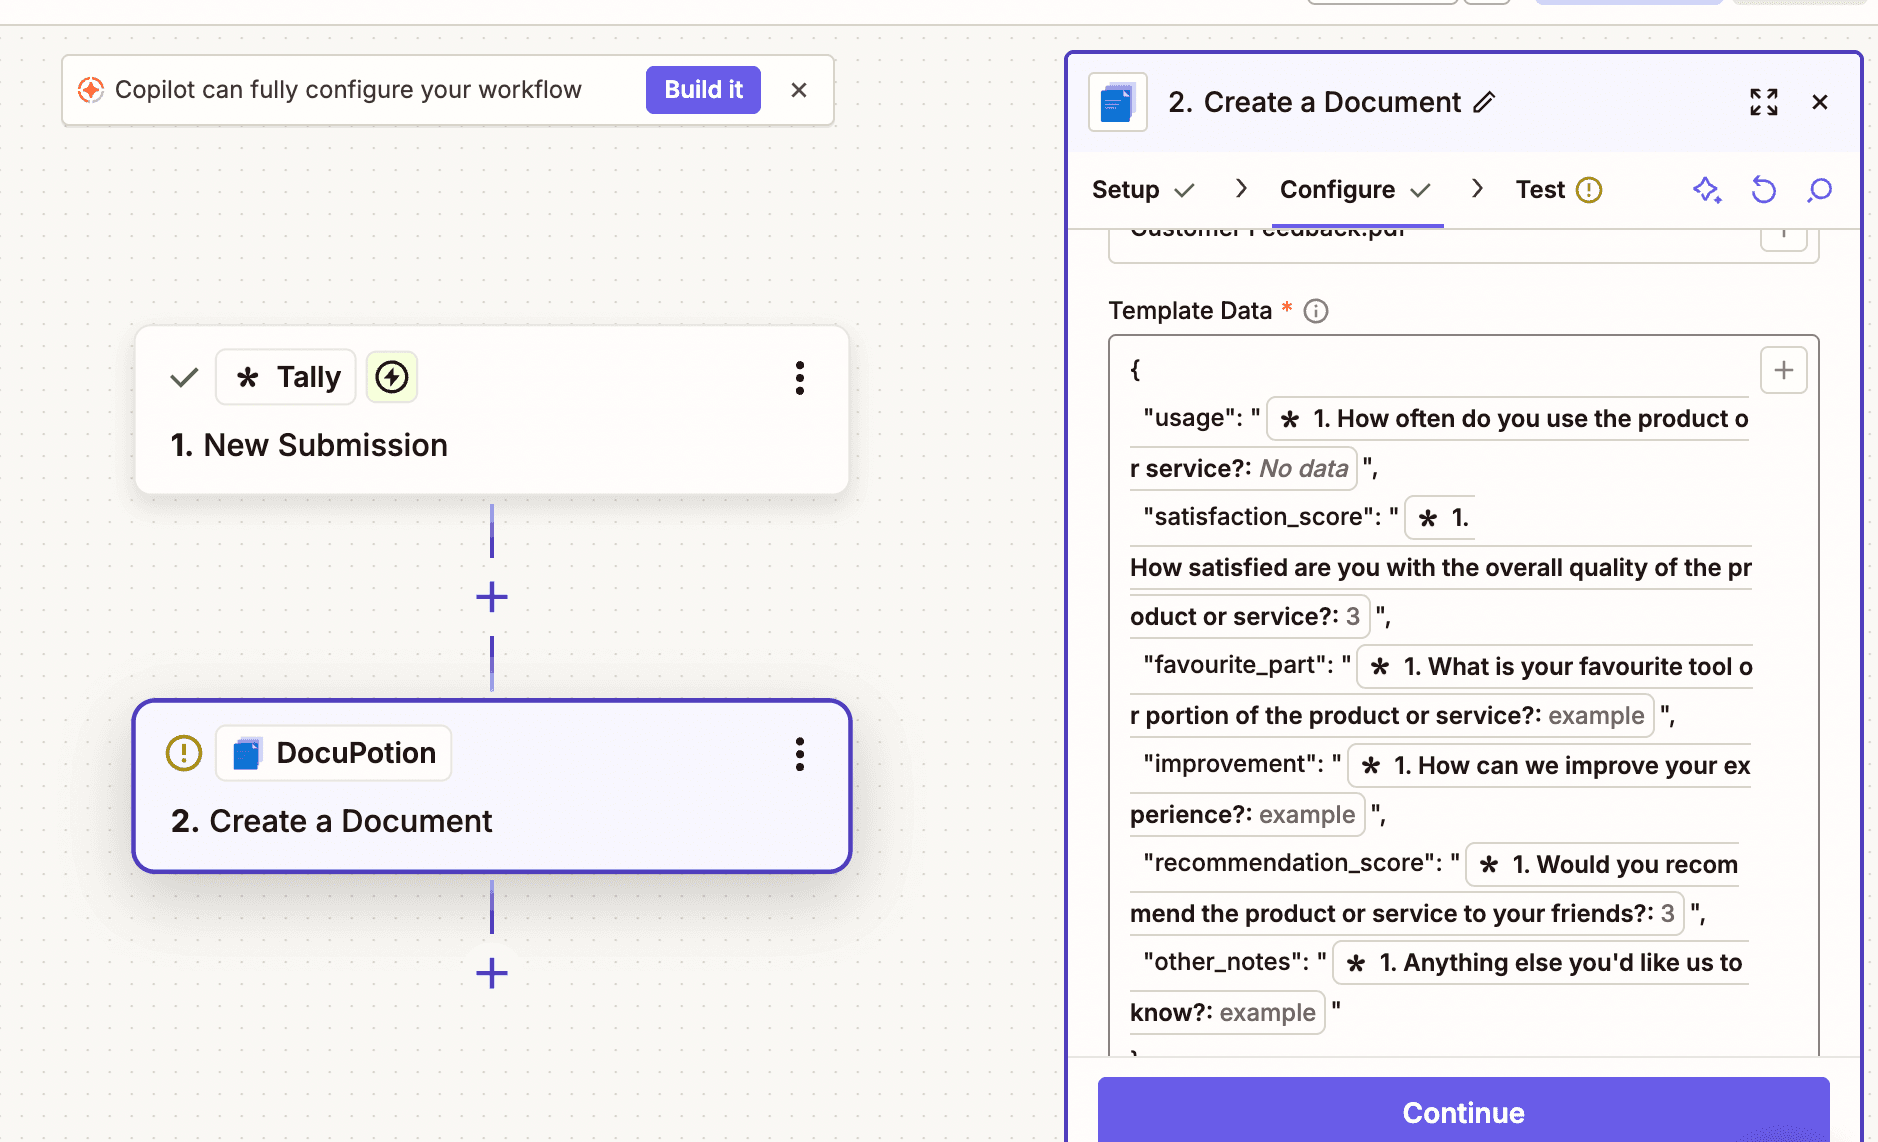
So sample data that looks like this in the editor:
{
  "customer_name": "Jane Doe",
  "usage": "Every day",
  "favourite_part": "The reporting dashboard",
  "other_notes": "Would love a dark mode"
}
becomes this once you map in the fields from your trigger step:
{
  "customer_name": "{{form_submission.name}}",
  "usage": "{{form_submission.how_often}}",
  "favourite_part": "{{form_submission.favourite_part}}",
  "other_notes": "{{form_submission.notes}}"
}
Rather than typing those tokens by hand, click into each value and insert the field from your trigger step, or previous action, using Zapier's field picker.
Step 7: Test and route the PDF
Click Continue and test the action. It should return a generated PDF in whichever output format you picked. With File, the PDF comes back as a binary file that any downstream Zapier action can accept, so you can:
- Email it. Attach it with Gmail, Outlook or an email-by-Zapier step.
- Save it. Upload it to Google Drive, Dropbox, OneDrive or S3.
- Post it. Send it to Slack or a webhook.
- Sign it. Pass it into a DocuSign or signature step.
Turn the Zap on and you're done. Every time your trigger fires, a fresh PDF is generated and routed wherever you need it.
More Zapier PDF workflow examples
The feedback report is one shape. The same Create a Document action covers almost any document. A few common patterns:
Invoice after a payment
- A Stripe (or other billing app) trigger fires on a successful payment.
- A Formatter step tidies up amounts, dates and totals if needed.
- DocuPotion Create a Document renders your invoice template with the payment data.
- Gmail emails the invoice to the customer as an attachment.
- Google Drive archives a copy in your accounting folder.
Certificate after a course completion
- A form or LMS trigger receives a course completion event.
- DocuPotion Create a Document renders a personalised certificate with the student's name, course title and completion date.
- Gmail emails the certificate to the student.
- Airtable logs the issue date against the student record.
Contract after a deal closes
- A HubSpot or Pipedrive trigger fires when a deal reaches the won stage.
- A Formatter or lookup step assembles the contract values.
- DocuPotion Create a Document renders the contract template.
- A DocuSign step routes the PDF for signature.
In every case the only thing you maintain once the Zap is live is the template itself, which you edit in DocuPotion without touching Zapier.
Tips and troubleshooting
A few things worth knowing as you build more Zaps.
Template IDs are stable across republishes
You can keep editing a template without breaking any Zaps that reference it. Only the published version is served, and the Template ID does not change when you republish.
Keep merge field names consistent
If you rename a field in the template, update the JSON in every Zap that calls it. Missing merge fields render as empty strings, which is easy to miss in a quick check.
Pick the right output format
Fileplugs straight into email and storage actions. This is the default for most Zaps.URLreturns a signed link. Useful when you'd rather share a link, or when the file is large and you don't want to carry it through the Zap.base64returns the raw encoded PDF. Useful when you're embedding the PDF into another API payload.
Watch your task usage
Each action step in a Zap consumes a task. Generating a PDF and then emailing and storing it is three steps. Keeping the document step down to a single Create a Document action (rather than a multi-step Google Docs flow) keeps your task count low.
Sanitise values from forms
If the data comes from a public form, trim whitespace and check numeric fields before the document step. This avoids layout surprises when an unexpected value lands in your template.
Alternative: call the DocuPotion API directly
If you'd rather not use the dedicated app, you can call the DocuPotion API from a Webhooks by Zapier step. Send a POST request to the API with your template ID and data, and the API returns the PDF as a presigned URL or a base64 string. The Create a Document action wraps this same request plus the file handling, so the Webhooks route is only worth reaching for when you need custom control. See the DocuPotion API docs for the full reference.
FAQ
How do I generate a PDF in Zapier?
Add the DocuPotion app to your Zap, choose the Create Document event, connect your account with your API key, then point the action at a DocuPotion template and map your trigger data to the template's merge fields. When the Zap runs, the action returns the finished PDF as a file or a hosted URL.
Does Zapier generate PDFs on its own?
No. Zapier has no native PDF generation. You either fill and export a Google Docs template across several steps, or use a dedicated document app like DocuPotion that does it in a single action.
Can I generate a PDF in Zapier without code?
Yes. With DocuPotion you describe the template in plain English and map fields through Zapier's field picker. There's no code and no developer involved at any point.
How do I add my data to the PDF?
Put a JSON object in the Template Data field with a value for each merge field in your template. The simplest way is to copy the sample JSON from the Data tab in the DocuPotion editor, then replace the static values with fields from a prior step in your Zap.
Can I email or store the generated PDF?
Yes. Choose the File output and the PDF comes back as a binary file. Any later Zapier step that accepts a file, such as Gmail, Outlook, Google Drive, Dropbox or Slack, can pick it up directly.
How much does it cost?
DocuPotion offers a free trial that includes 50 documents and doesn't require a credit card, so you can build and test your first Zap end to end before committing. See the pricing page for current tiers.